Krok 1:
If your Tuya-based security camera will not connect to your home network, drops the WiFi signal repeatedly, or you are in Germany, Austria, or another EU jurisdiction where network-connected surveillance devices face GDPR scrutiny — you are not dealing with a hardware fault. You are dealing with a configuration problem that has a precise, reproducible solution.
This guide covers the complete setup procedure for Tuya C10 smart security modules, from router configuration and first WiFi pairing, through to enabling the hardware-level local recording mode that keeps all footage physically off the cloud — satisfying the strictest GDPR requirements without any firmware modification.
What Is the Tuya C10 Module and Why It Only Works on 2.4 GHz
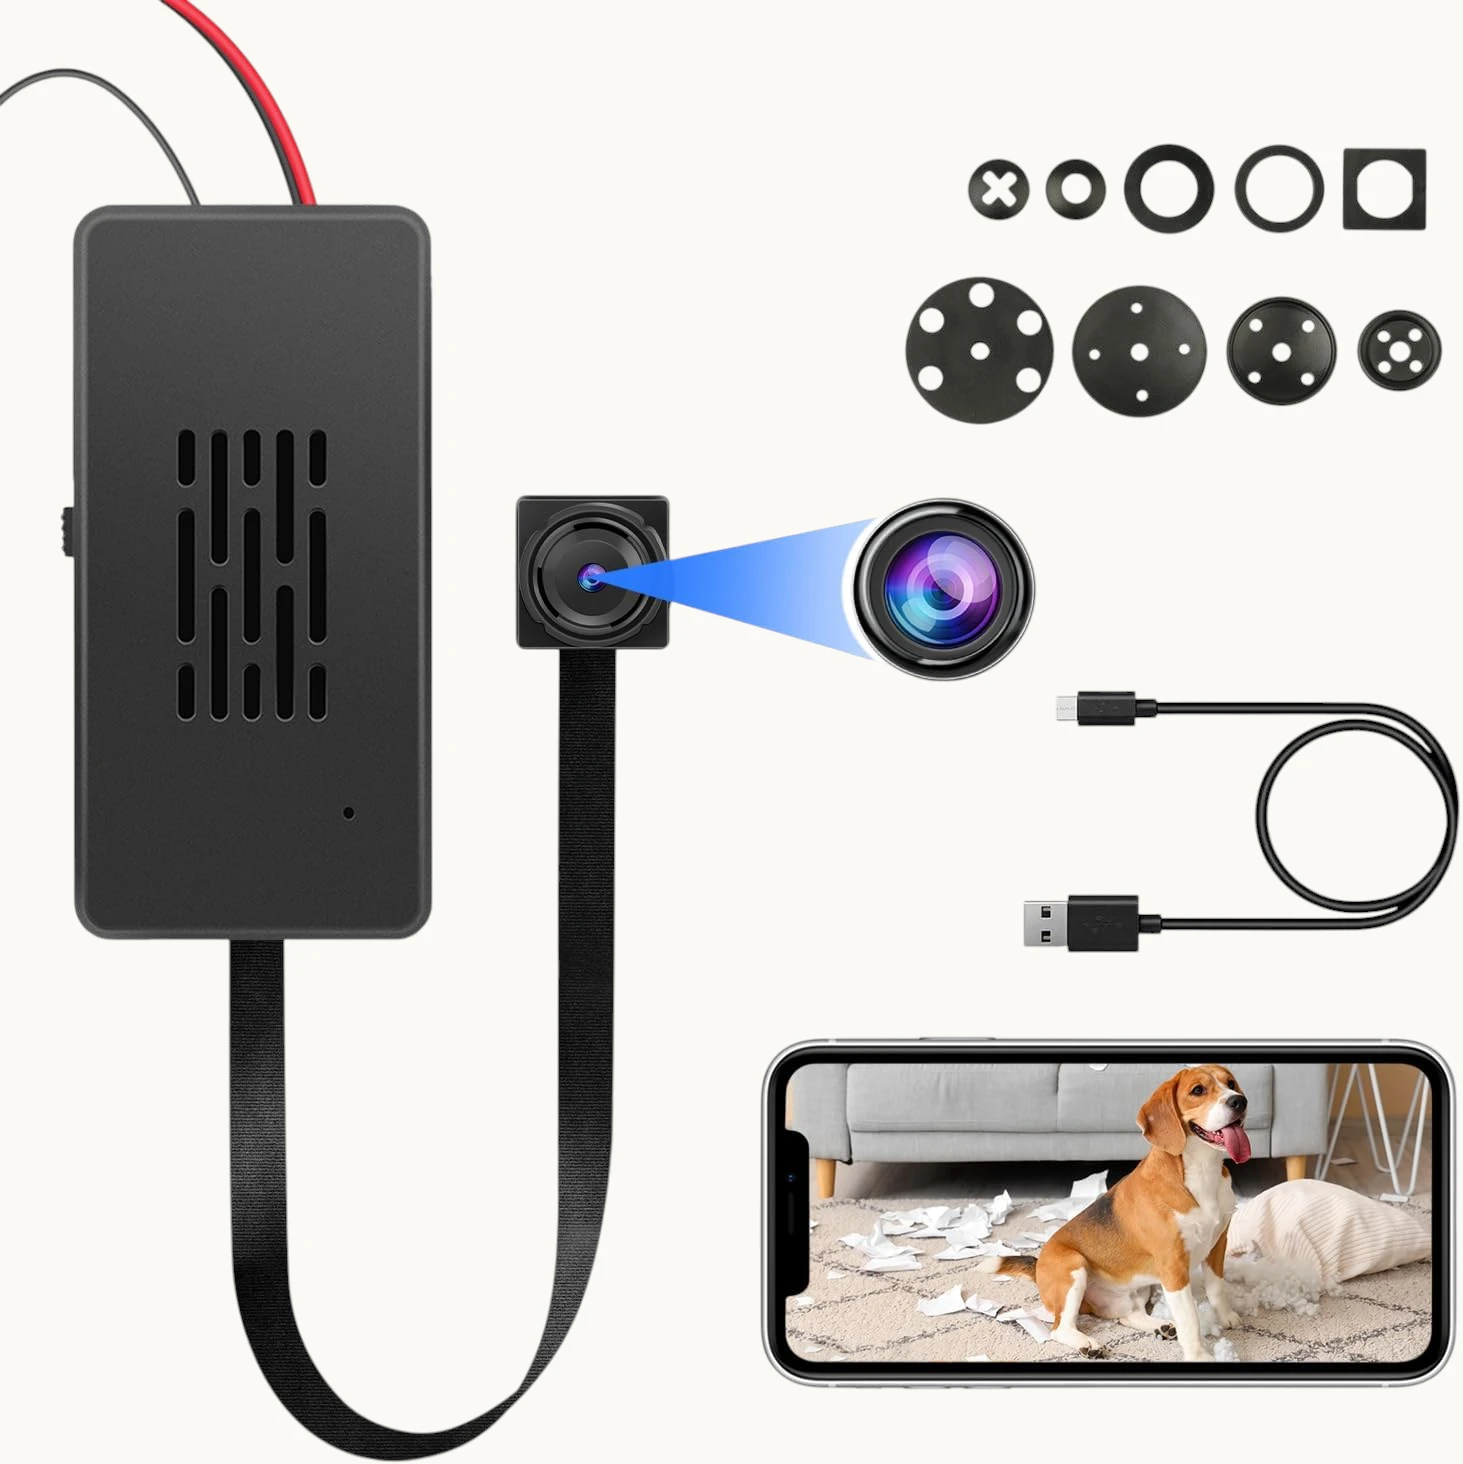
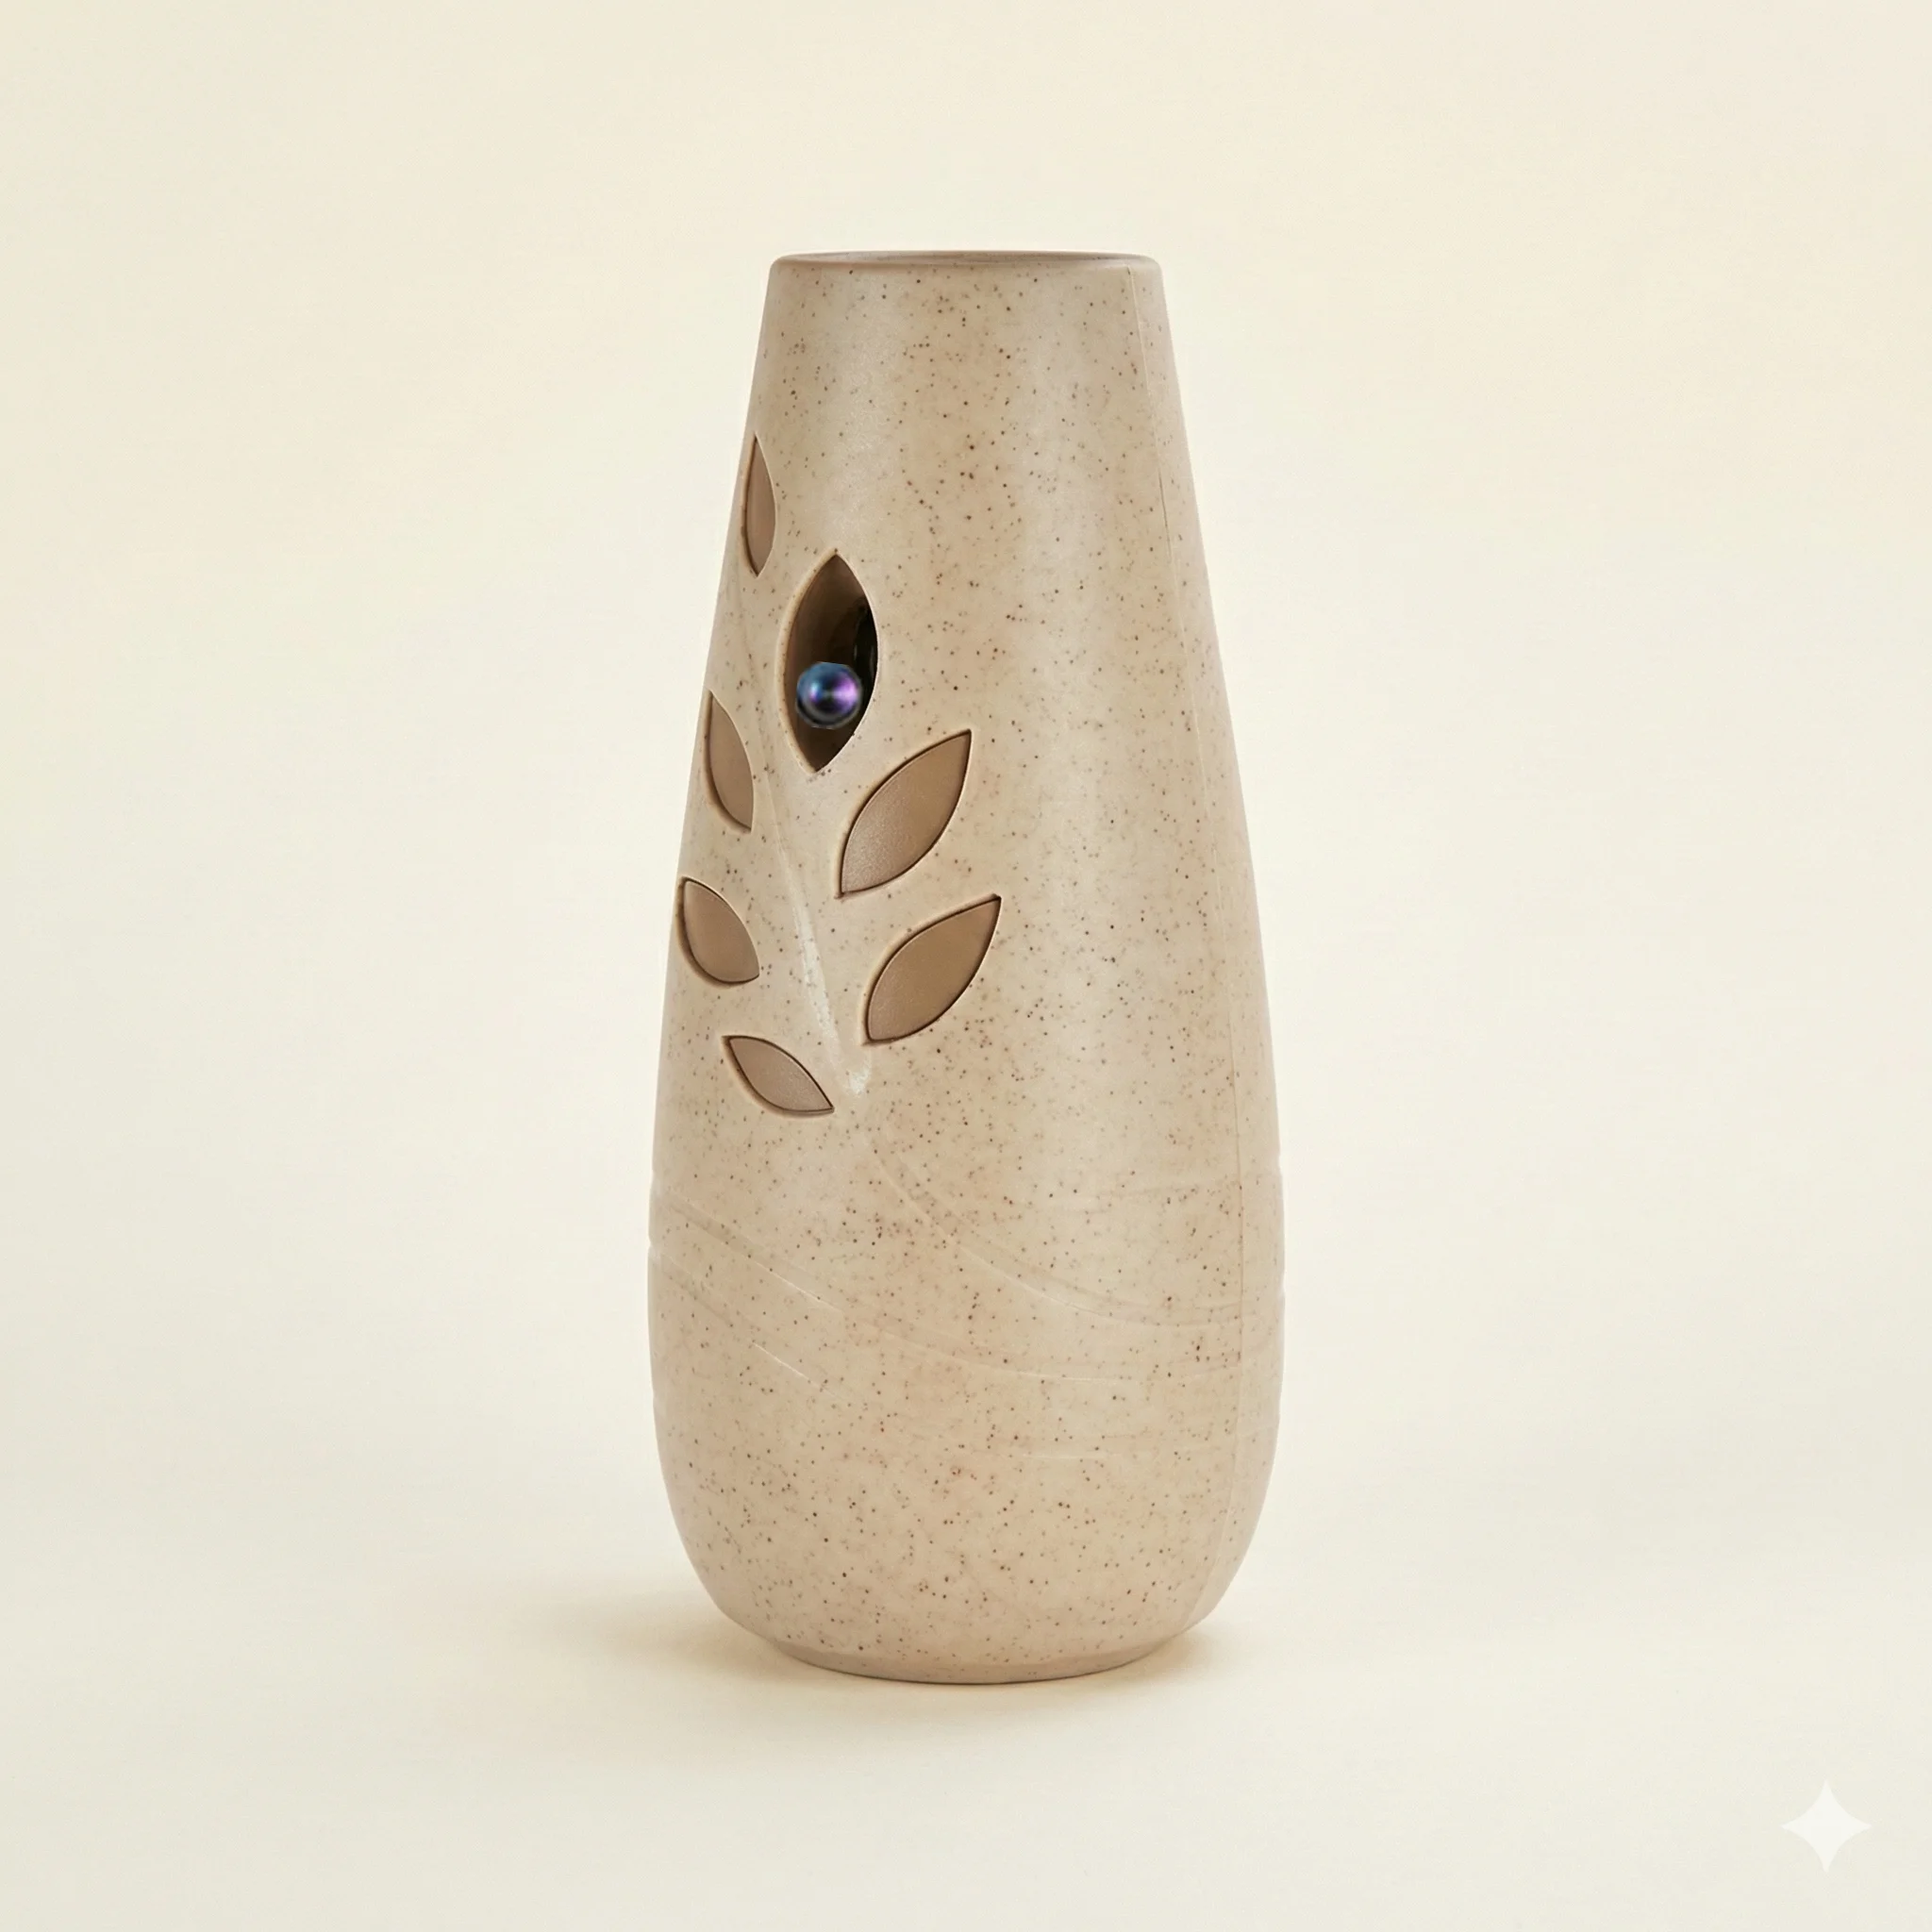
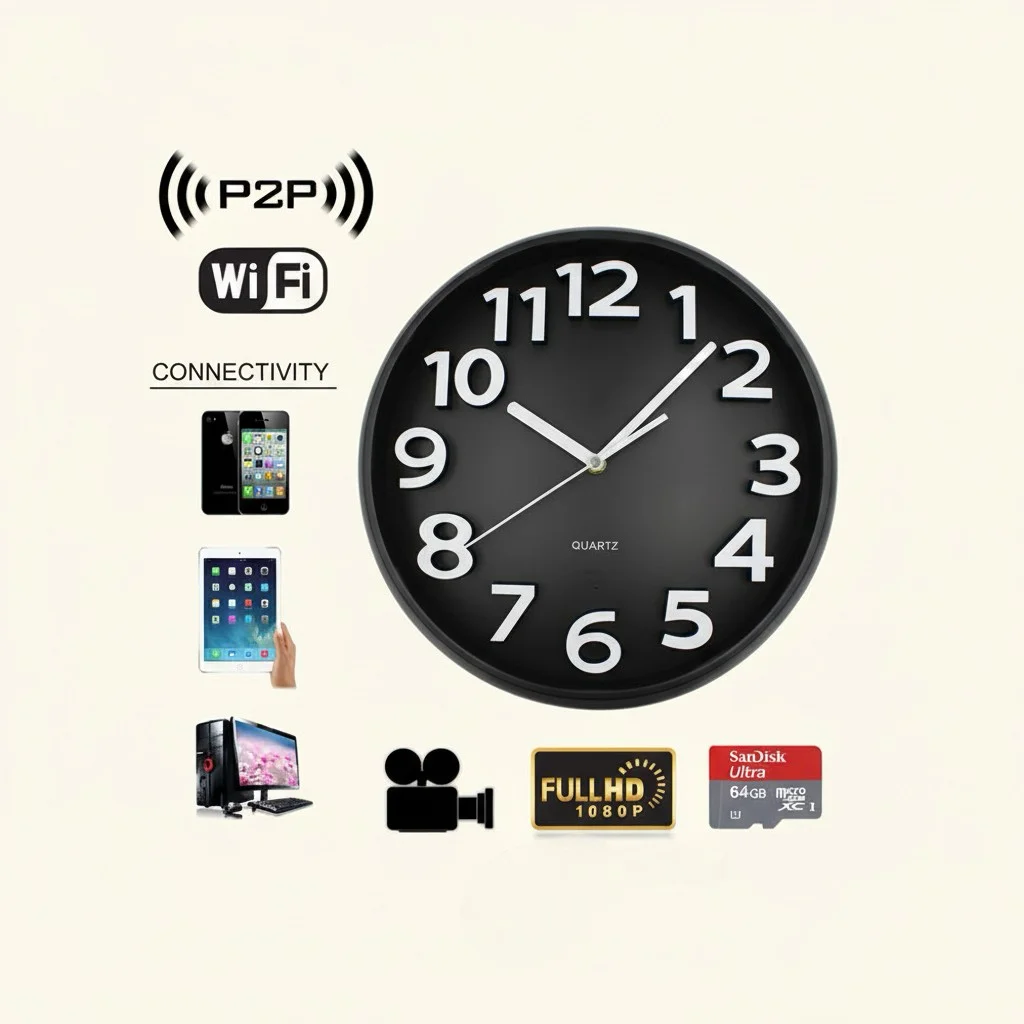
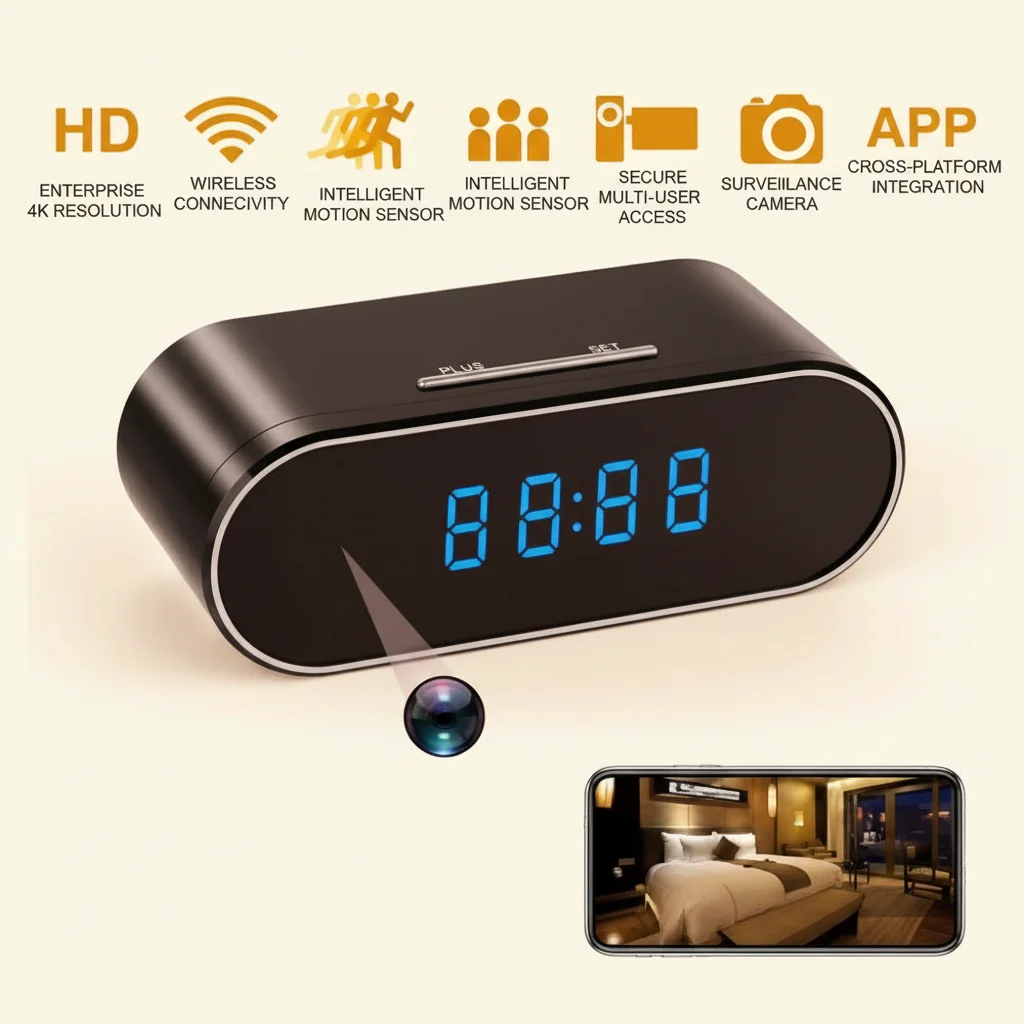
The Tuya C10 is a compact dual-column WiFi module based on the RTL8710BN chipset — a low-power, ARM Cortex-M4F MCU with an integrated 802.11 b/g/n radio. It is embedded in QZT clock cameras, socket cameras, air-freshener cameras, and power bank cameras to provide P2P remote viewing, push notification delivery, and cloud storage through the Tuya Smart or Smart Life application.
The technical constraint that causes the majority of first-time connection failures is this: front-end RF modułu C10 jest dopasowany impedancyjnie wyłącznie do pasma ISM 2,4 GHz. The PCB antenna trace is tuned for 2.4 GHz center frequency with a bandwidth of approximately 100 MHz. At 5 GHz, the impedance match degrades severely — VSWR rises from ~1.5:1 to above 3:1, reducing effective radiated power by 6–10 dB. In practical terms, a 5 GHz association attempt typically succeeds within the same room as the router, fails at 5 meters through a plasterboard wall, and is effectively impossible through a concrete wall.
This is a hardware design decision made at the module level, not a firmware limitation that can be updated. The C10 module will never be able to connect to 5 GHz networks regardless of firmware version.
The implication for your router configuration: Your router must expose a separate, dedicated 2.4 GHz SSID. This is not optional.
Dlaczego funkcja “Smart Connect” Twojego routera zakłóca parowanie

Most modern routers from ASUS, TP-Link, Netgear, and FritzBox ship with Smart Connect (czasami oznaczane jako “Band Steering” lub “One SSID”) domyślnie włączone. Smart Connect łączy radia 2,4 GHz i 5 GHz pod jedną nazwą sieci — router decyduje, które urządzenie łączy się z którą częstotliwością na podstawie aktualnej siły sygnału i pojemności.
For smartphones and laptops this works seamlessly. For Tuya C10 modules it causes a silent, hard failure: the module broadcasts a probe request on 2.4 GHz, the router responds with a 5 GHz association redirect, the C10 chipset — unable to process 5 GHz frames — does not complete the handshake, and after three failed attempts the module reverts to factory EZ mode and waits.
The router configuration change below is the single most important step in the entire setup process. Without it, every subsequent step fails regardless of how carefully you follow them.
To fix it:
1. Otwórz panel administracyjny routera (zwykle 192.168.0.1 lub 192.168.1.1).
2. Log in with the credentials printed on the router label or set by your ISP.
3. Navigate to Bezprzewodowy → Wireless Settings or WiFi Settings.
4. Locate Smart Connect, Band Steering, or One SSID.
5. Disable it.
6. You will now see two separate configuration sections: Catalogo QZT power bank camera H3 e H20 — specifiche complete oraz 5 GHz.
7. Nadaj swojej sieci 2,4 GHz wyraźną, odrębną nazwę, taką jak `Network_2G` lub `MyHome_24` — nie używaj spacji ani znaków specjalnych; parser SSID modułu C10 nie obsługuje spacji w nazwach sieci.
8. Assign your 5 GHz network any name you prefer.
9. Save settings and wait 30 seconds for the router to apply the changes.
Przed kontynuacją upewnij się, że Twój telefon jest podłączony do sieci 2,4 GHz — sprawdź ekran szczegółów WiFi; niektóre telefony z Androidem wyświetlają oznaczenie “5G” lub “2,4G” bezpośrednio w polu SSID.
Preparing Your Phone: The Tuya App Connection Checklist
Before powering on the camera, prepare your phone to avoid a failed pairing at the app step.
Download and install the correct app. Search for Tuya Smart (blue icon with a house) or Smart Life (pomarańczowa ikona) w Apple App Store lub Google Play Store. Obie aplikacje korzystają z tego samego zaplecza; każda z nich działa z modułami QZT C10. Nie używaj aplikacji firm trzecich typu “ogólne inteligentne domy” — często używają one przestarzałych wersji protokołu Tuya niezgodnych z aktualnym oprogramowaniem układowym.
Critical: Turn off mobile data before pairing. Protokół parowania Tuya EZ mode wykorzystuje lokalną transmisję UDP na porcie 8883. Jeśli dane komórkowe w telefonie są aktywne, przekaźnik chmurowy Tuya przechwytuje uzgadnianie parowania, a lokalna transmisja modułu jest ignorowana. W iOS: przeciągnij w dół Centrum sterowania i wyłącz Dane komórkowe. W Androidzie: przeciągnij w dół zasłonę powiadomień i dotknij ikony Danych komórkowych, aby je wyłączyć, lub przejdź do Ustawienia → Sieć i Internet → Sieć komórkowa i wyłącz ją.
Keep your location on. Tuya devices use Bluetooth LE advertising during the pairing phase to broadcast their device ID to the app. Android 8+ requires location permission to scan for Bluetooth LE — this is a Tuya SDK requirement, not a data-collection mechanism. Grant the permission.
Resetting and Entering EZ Pairing Mode Correctly
The C10 module has two pairing modes: EZ Mode (easy WiFi config via broadcast) and AP Mode (access point fallback). Most users need only EZ mode. Here is how to enter it reliably:
Step 1: 2. Wstaw.
Step 2: Włóż sformatowaną kartę microSD FAT32 (32 GB lub 64 GB, schemat partycji MBR) do gniazda SD urządzenia. Ten krok jest wymagany, nawet jeśli planujesz używać nagrywania w chmurze — oprogramowanie układowe C10 sprawdza obecność karty SD podczas rozruchu, aby określić domyślny tryb nagrywania.
Step 3: Power on the device. Wait 20 seconds for the module to fully initialize. On clock cameras, the LED shows a solid color; on socket cameras, the LED begins blinking.
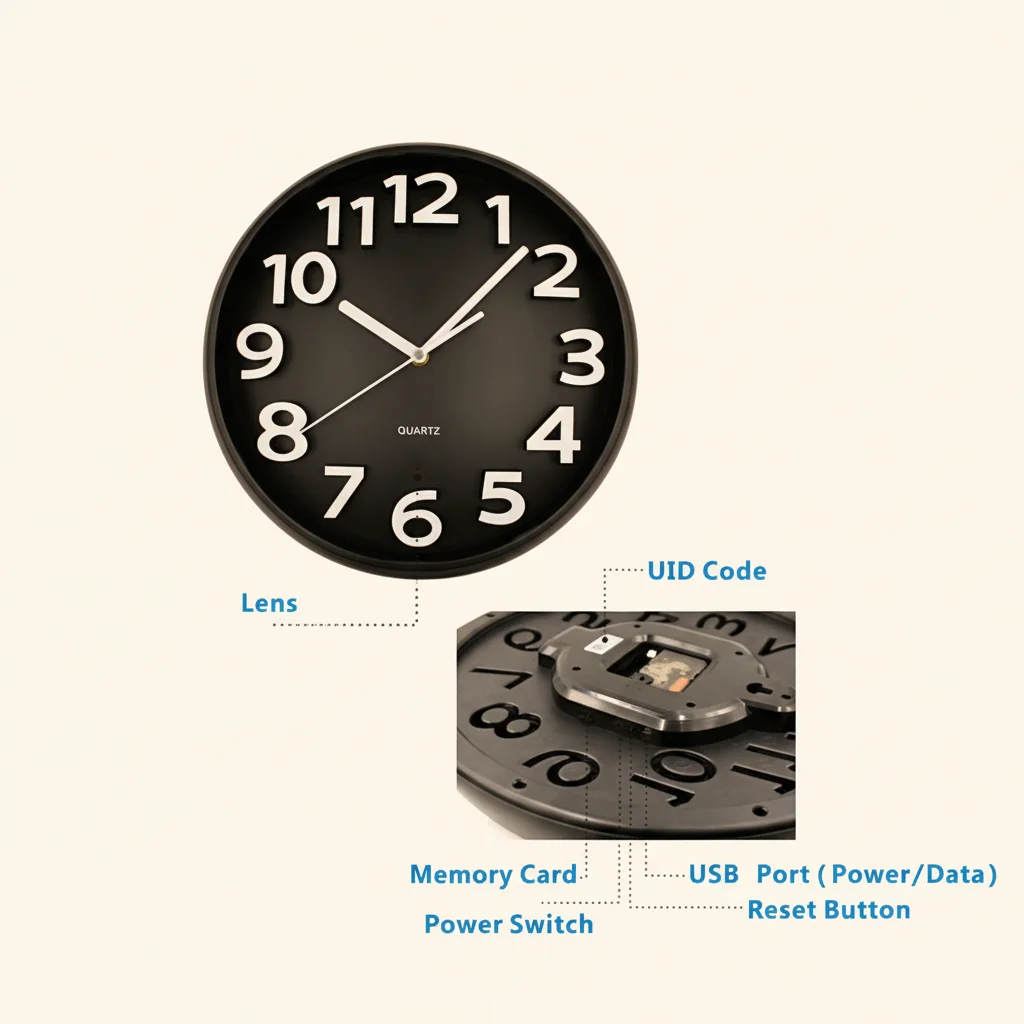
Step 4: Locate the reset button. On wall clock cameras it is typically in the battery compartment or on the rear panel beside the USB port. On socket cameras it is in a pinhole beside the USB charging port. On air-freshener cameras it is on the underside of the unit.
Step 5: Using the provided reset pin or a straightened paperclip, press and hold the reset button for 6–7 seconds — not a quick tap. The LED must change state: on most models, the LED changes from slow blink (0.5 Hz) to fast blink (2 Hz), indicating the module has cleared its stored SSID and is now broadcasting in EZ mode.
Step 6: Verify the LED pattern: 2 flashes per second is the correct state. If the LED is still slow-blinking or solid, the reset did not register — power cycle and repeat.
Step 7: Proceed to the app immediately. The EZ broadcast window is 3 minutes. If you do not complete pairing within this window, the module exits EZ mode and reverts to its last stored configuration.
Completing the App Pairing: Adding the Device
With the router configured, the SD card inserted, and the module in fast-blink EZ mode, open the Tuya Smart or Smart Life app.
In the app:
1. Tap the + icon (top right) to add a device.
2. Select Camera or Security Camera from the category list — or tap Add Manually i wyszukaj “C10” lub konkretny model kamery (np. “Clock Camera”, “Socket Camera”).
3. Na ekranie “Wybierz WiFi” potwierdź, że jesteś podłączony do Catalogo QZT power bank camera H3 e H20 — specifiche complete network you configured earlier. Enter the WiFi password and tap Next.
4. Aplikacja wyświetli ekran z instrukcją: “Upewnij się, że urządzenie jest w trybie szybkiego migania”. Potwierdź, że dioda LED miga szybko (2 Hz) i dotknij Confirm.
5. The app sends the SSID and password to the module via the local UDP broadcast. The module receives this broadcast, disconnects from its EZ beacon, connects to your router, and then sends an MQTT register packet to the Tuya cloud. The app detects this registration within 20–30 seconds and marks the device as online.
What if pairing times out after 60 seconds?
This typically means the module did not receive the WiFi credentials. Possible causes and fixes:
– Wrong frequency: Your phone is still on the 5 GHz network. Switch to 2.4 GHz in WiFi settings before retrying.
– SSID with spaces: Rename the 2.4 GHz SSID in your router to remove spaces (e.g., `Network_2G` instead of `Network 2G`) and try again.
– Weak signal: Move the camera closer to the router during initial setup, then relocate it afterward.
– MAC filtering enabled: Jeśli Twój router ma filtrowanie adresów MAC WiFi, wyłącz je lub dodaj adres MAC modułu C10 (wydrukowany na naklejce wewnątrz urządzenia lub widoczny w aplikacji Tuya po udanym sparowaniu) do listy dozwolonych.
If all of the above are correct and pairing still fails, switch to AP Mode (dotknij “Tryb AP” na dole ekranu parowania): aplikacja tworzy lokalny hotspot WiFi z Twojego telefonu, moduł łączy się z nim bezpośrednio, a dane uwierzytelniające są przesyłane przez to bezpośrednie połączenie. Tryb AP jest wolniejszy, ale bardziej niezawodny w środowiskach z dużymi zakłóceniami 2,4 GHz.
Enabling GDPR-Compliant Offline Recording: Physical Cloud Disconnection
For customers in Germany, Austria, Switzerland, France, and other EU jurisdictions — or any user who simply wants zero cloud exposure — the C10 module supports a hardware-enforced local-only mode that makes cloud connection physically impossible. This is not a settings toggle in the app; it is a physical configuration that the firmware reads at boot time to determine the operating mode.
How it works:
Oprogramowanie C10 sprawdza obecność karty SD sformatowanej w systemie FAT32 podczas sekwencji rozruchowej. Jeśli karta SD jest obecna i żadne dane logowania do WiFi nie zostały nigdy zapisane w nieulotnej pamięci modułu, oprogramowanie całkowicie pomija rejestrację w chmurze MQTT, aktywuje wbudowany podsystem DVR i rozpoczyna lokalne nagrywanie w pętli z ustawioną rozdzielczością i liczbą klatek na sekundę. Moduł WiFi pozostaje aktywny, ale jest używany tylko do opcjonalnego bezpośredniego połączenia P2P (bez przekaźnika w chmurze).
This is a one-time configuration. Once set, the device operates in local-only mode indefinitely — it will not reconnect to the cloud even if you add it to the Tuya app later.
To activate offline local recording mode:
1. Power off the device completely. Unplug the power cable.
2. Insert a WiFi zegar kamera P2P łączność i zdalny widok interfejs konfiguracji Karta microSD (32 GB lub 64 GB, partycja MBR) do gniazda SD. Maksymalna pojemność to 64 GB; systemy exFAT i NTFS nie są obsługiwane przez sterownik FATfs w C10.
3. Do not connect the device to WiFi. Do not add it to the Tuya app. Do not power it on while connected to a router.
4. Power on the device. Wait 3 minutes. The LED will transition from slow blink (booting) to a pattern specific to local recording mode — on most clock cameras this is a steady dim LED rather than the bright flash of cloud-connected mode.
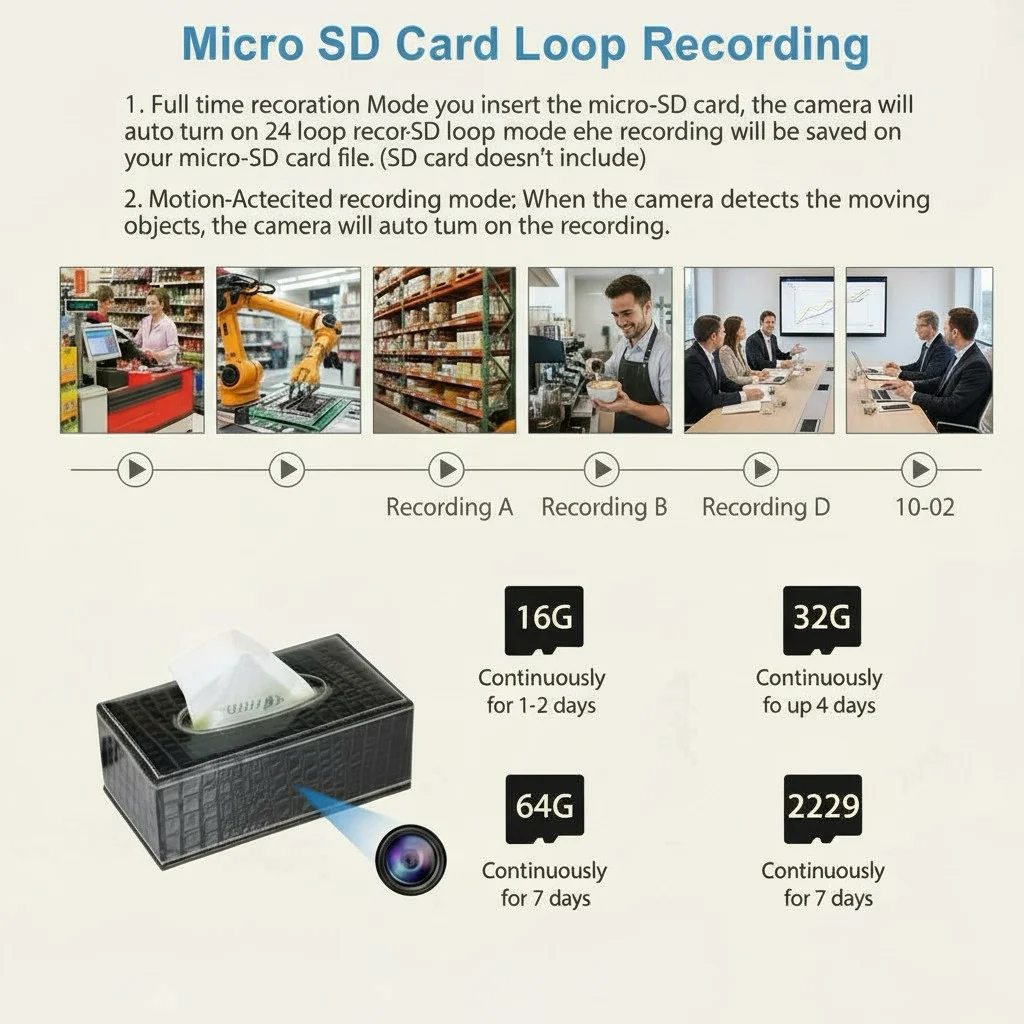
5. Recording begins automatically. The device records continuously in loop-overwrite mode: when the SD card is full, the oldest footage is automatically deleted and replaced with new footage.
SD card capacity and loop recording:
| SD Card Size | 1080P @ 15 fps (estimated hours) | 720P @ 15 fps (estimated hours) |
|---|---|---|
| 32 GB | ~40 hours | ~60 hours |
| 64 GB | ~80 hours | ~120 hours |
Note on the 3-minute delay: During the first boot with an SD card present and no stored WiFi credentials, the module performs a network scan to confirm there is no matching Tuya cloud account configured. This scan takes approximately 3 minutes. After confirmation, the local recording mode is locked in.
Why 2.4 GHz Optimization Matters for Range and Stability

Once your device is online and configured, the 2.4 GHz frequency choice that seemed like a constraint becomes an advantage. The 2.4 GHz band penetrates walls, floors, and furniture significantly better than 5 GHz, which is why it remains the standard for WiFi-based security cameras across the entire industry.
At a typical indoor location with plasterboard walls, a 2.4 GHz signal maintains usable signal strength (-65 dBm) at approximately 25–30 meters from the router. The 5 GHz signal typically degrades below usable threshold (-75 dBm) at 12–15 meters through the same wall structure.
For wall clock cameras and socket cameras — which are typically mounted in rooms far from the router — the 2.4 GHz optimization is not a limitation. It is the reason the device will maintain a stable connection through multiple walls where a 5 GHz competitor would require a WiFi extender.
To maximize WiFi stability after setup:
– Trzymaj urządzenie z dala od kuchenek mikrofalowych i bezprzewodowych telefonów 2,4 GHz, które działają na tych samych częstotliwościach i powodują przerywane zakłócenia.
– Jeśli urządzenie znajduje się w odległości większej niż 20 metrów od routera lub za dwiema lub więcej betonowymi ścianami, rozważ węzeł sieci WiFi typu mesh lub przewodowy mostek Ethernet-WiFi zamiast polegania wyłącznie na łączu radiowym.
– Sprawdź wskaźnik jakości połączenia w aplikacji Tuya (dostępny w ekranie ustawień urządzenia w sekcji “Informacje o urządzeniu” lub “Status sieci”). Siła sygnału poniżej -80 dBm wskazuje na marginalne połączenie, które może zanikać w okresach dużego ruchu.
How to Return a Locally Configured Device to Cloud Mode
If you initially set the device to offline local recording mode and later want to connect it to the Tuya cloud — for example, to enable remote viewing when away from home — you can reset the local-only lock and re-pair it:
1. In the Tuya Smart or Smart Life app, press and hold the reset button for 10 seconds to clear all stored configuration (including the local-only lock).
2. Power cycle the device.
3. Insert the SD card and power on.
4. Open the Tuya app, add the device following the standard EZ pairing procedure.
5. The cloud connection is restored.
This works because the local-only mode is not a firmware lock — it is simply the absence of stored WiFi credentials. Clearing the stored credentials removes the lock.
Często zadawane pytania
Pyt.: Aplikacja wyświetla “Urządzenie jest offline” po sparowaniu. Co należy sprawdzić w pierwszej kolejności?
Odp.: W aplikacji Tuya przejdź do ekranu ustawień urządzenia i sprawdź wartość “Status sieci” lub “Siła sygnału”. Jeśli pokazuje -85 dBm lub słabszy, sygnał WiFi jest zbyt słaby — przesuń kamerę bliżej routera lub dodaj wzmacniacz WiFi. Jeśli sygnał jest dobry (-70 dBm lub lepszy), a urządzenie nadal jest offline, sprawdź, czy Twój router nie blokuje nowych połączeń urządzeń (niektóre routery mają funkcję “blokowania nowych urządzeń”, którą należy wyłączyć).
Q: Can I use a 5 GHz router if I change the network name on 2.4 GHz?
A: Yes, as long as your router exposes a separate 2.4 GHz SSID. The router itself can be a dual-band or tri-band unit — what matters is that your 2.4 GHz and 5 GHz networks have different names. Your phone and the C10 module connect to the 2.4 GHz name; your other devices can use either frequency.
Q: Does the local recording mode affect motion detection alerts?
A: In local-only mode, motion detection still works — the device will save a clip triggered by motion to the SD card. However, push notifications to your phone require a cloud connection. If you need both local recording and remote alerts, use the standard cloud-connected configuration with the SD card inserted for local backup; the SD card provides redundancy but does not prevent cloud connectivity.
Q: How do I view footage recorded in local-only mode without the cloud?
A: There are two options: connect the device to a PC via USB (the SD card appears as a removable drive) and browse the AVIs directly; or enable the P2P direct connection option in the Tuya app while the device is connected to your local network — P2P mode streams the live view and playback directly from the device to your phone without routing through the Tuya cloud. Both options satisfy GDPR local-storage requirements.
Q: Can multiple users access the same camera in local-only mode?
A: P2P direct connection supports up to 3 simultaneous viewers. Cloud-connected mode supports up to 5 simultaneous users with an active Tuya cloud account. For multi-user scenarios, cloud-connected mode with individual Tuya account invites is the supported configuration.
Wnioski
The majority of Tuya C10 connection failures trace back to two root causes: a router running Smart Connect, and a phone with mobile data enabled during pairing. Both are straightforward to fix. Disable Smart Connect and expose a dedicated 2.4 GHz SSID, confirm your phone is on that 2.4 GHz network with mobile data off, reset the device to fast-blink EZ mode, and complete pairing in the Tuya app.
For GDPR-compliant deployment, the procedure is even simpler: insert a FAT32 SD card before first power-on, and do not configure WiFi. The device automatically enters local-only recording mode within 3 minutes, keeping all footage on-premises with no cloud exposure whatsoever.
For users who start in local mode and later want cloud access, a 10-second reset clears the local-only lock and restores standard cloud pairing — the configuration is fully reversible.