How to Set Up a WiFi Power Bank Camera for Remote Monitoring
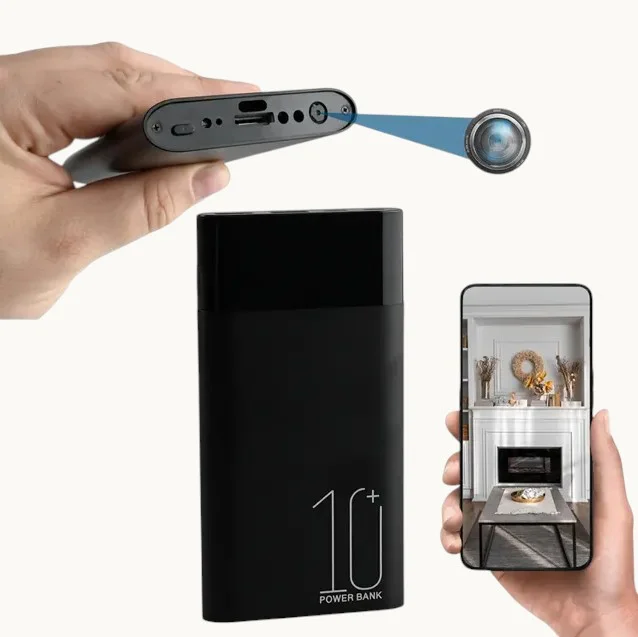
A WiFi power bank camera is one of the most versatile hidden surveillance devices available. It looks exactly like a standard portable charger — and actually functions as one — while secretly containing a high-definition camera capable of live streaming to your smartphone from anywhere in the world.
What Is a WiFi Power Bank Camera
A WiFi power bank camera is a dual-function device: it’s a real working power bank (5000mAh–10000mAh) that you can use to charge phones and tablets, and it’s simultaneously a hidden surveillance camera with WiFi connectivity.
The camera lens is concealed behind a small pinhole in the power bank casing, typically positioned near the top or front face. When placed on a desk or shelf, it provides a natural wide-angle view of the room while appearing to be an ordinary power bank left out for charging convenience.
Modern models include live streaming, motion detection, night vision, two-way audio, and cloud or local storage — features that rival dedicated security cameras but in a completely portable, inconspicuous package.
Key Features of a Quality WiFi Power Bank Spy Camera
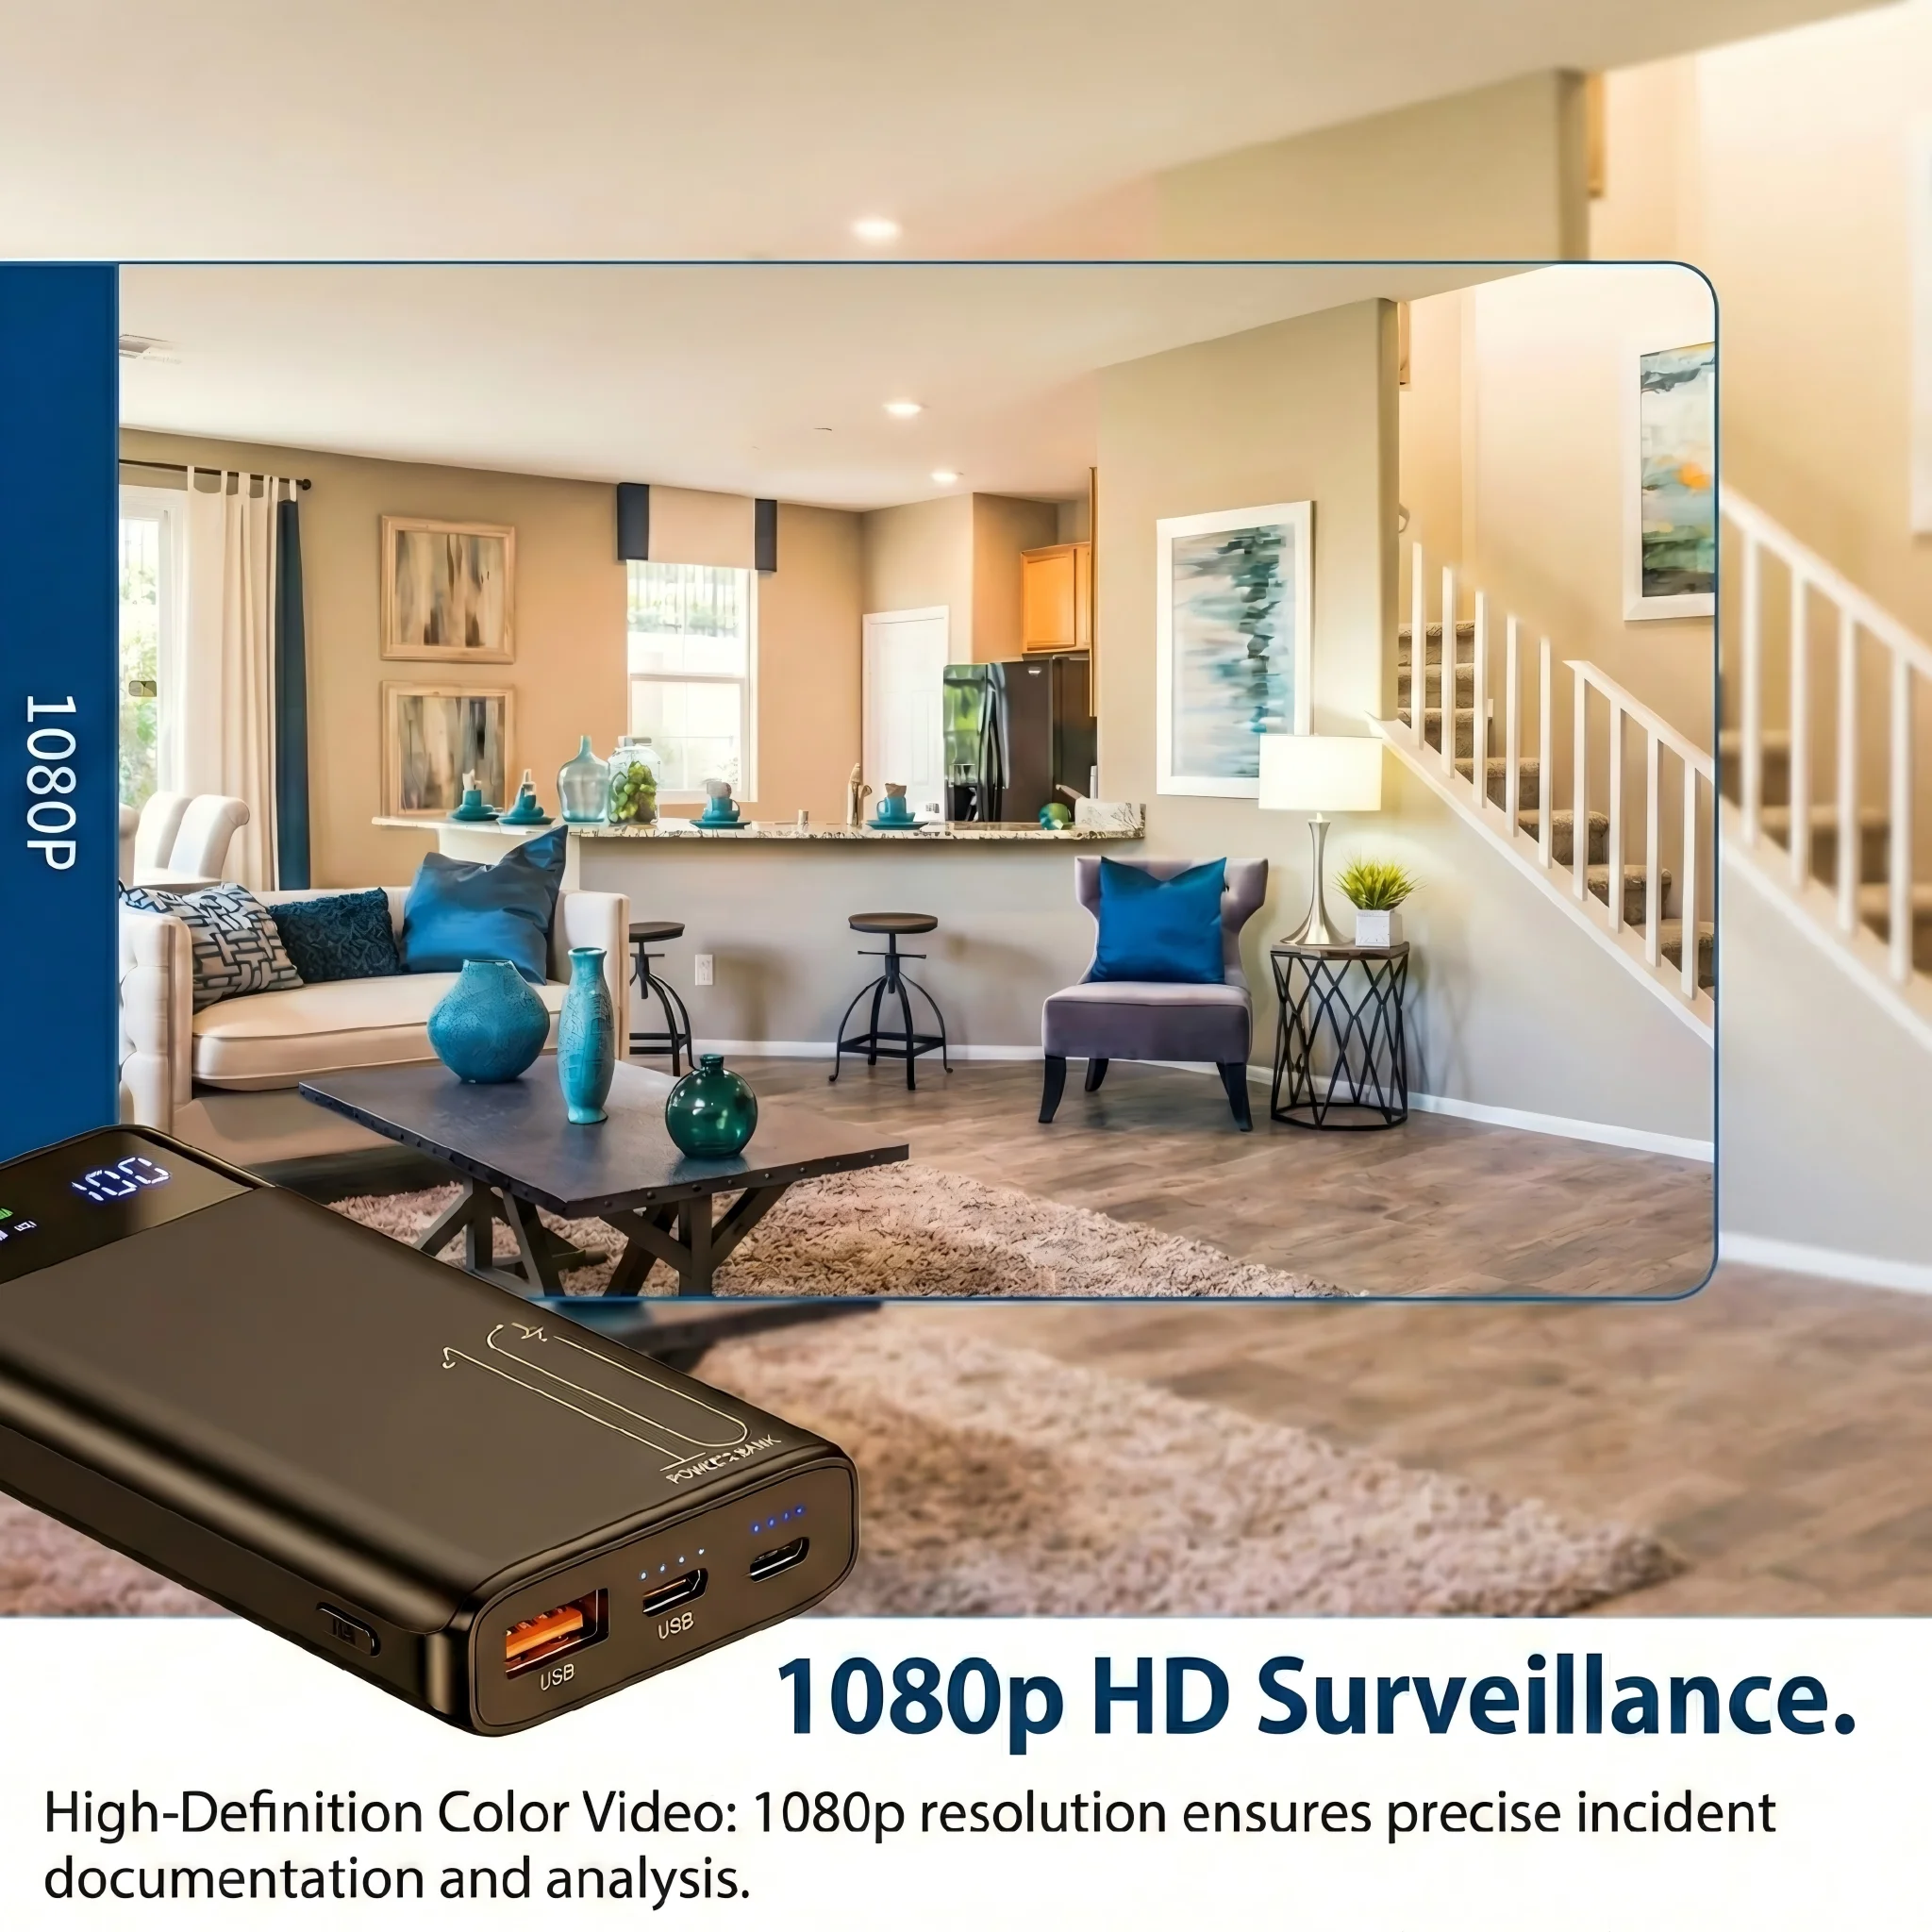
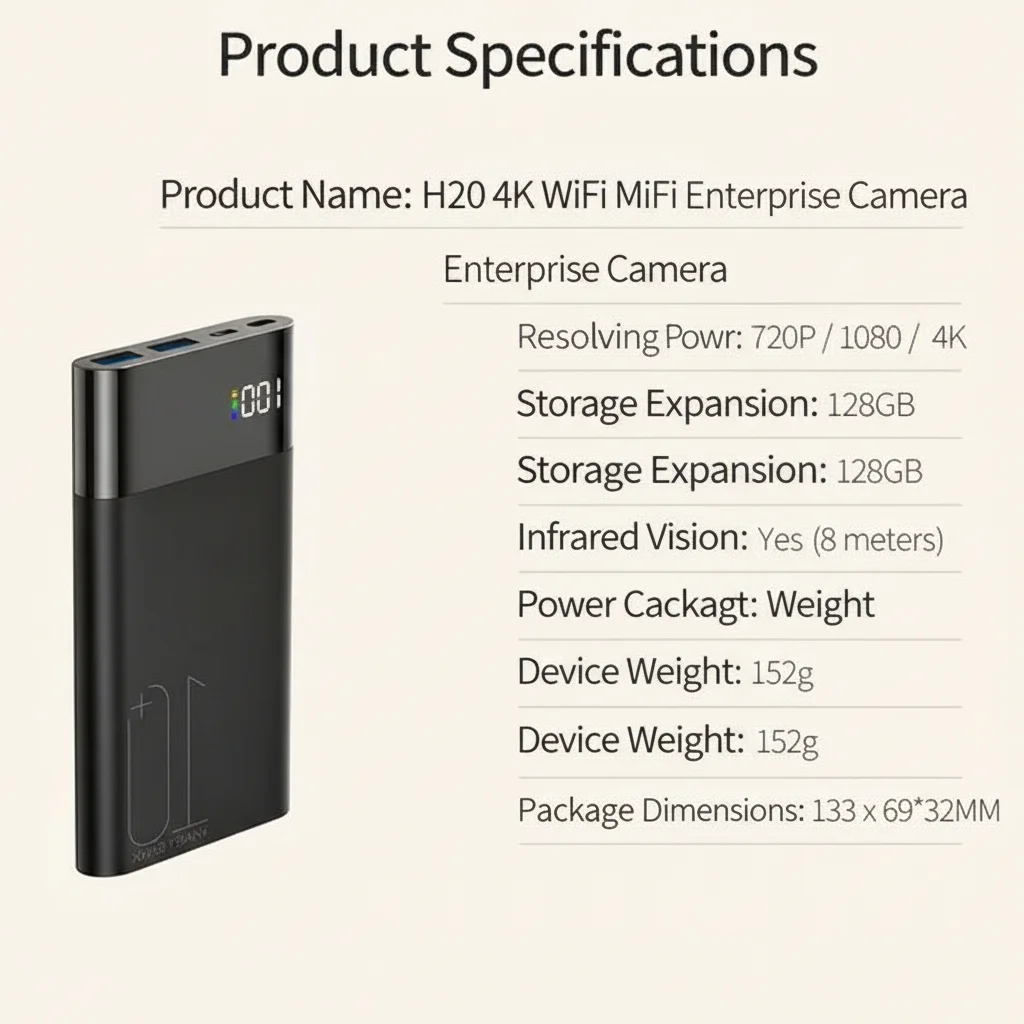
1080p HD or 4K video resolution. The standard for clear, detailed footage. 4K models provide exceptional detail but require more storage and bandwidth.
WiFi live streaming. Connect via 2.4GHz or 5GHz WiFi to view live footage from your smartphone anywhere in the world. Most models use a dedicated app.
Motion detection alerts. The camera detects movement and sends push notifications to your phone, with automatic recording triggered by the motion.
Infrared night vision. IR LEDs activate in low-light conditions to provide clear black-and-white footage in complete darkness.
Two-way audio. Some models include a microphone and speaker, allowing you to hear and speak through the camera remotely.
Loop recording. When the microSD card is full, the oldest footage is automatically overwritten. This ensures continuous recording without manual intervention.
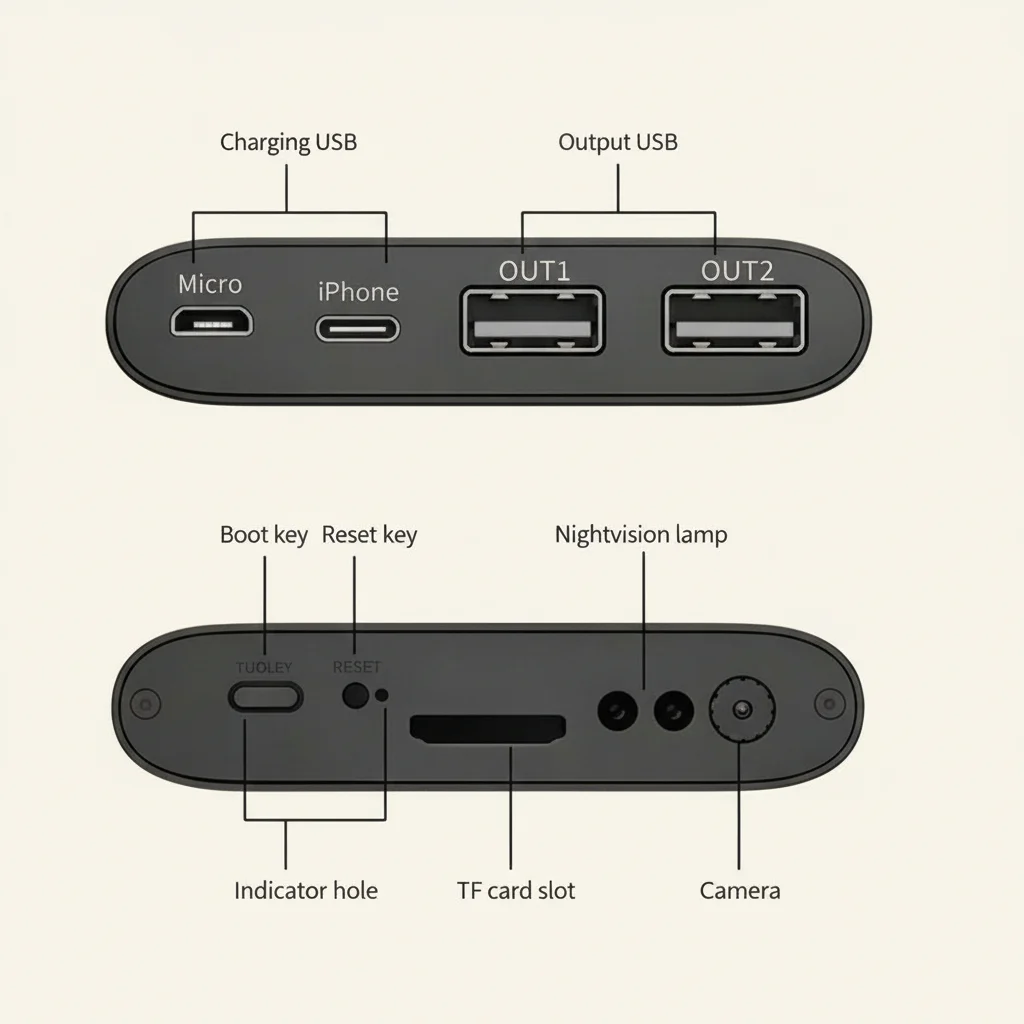
Working power bank function. The device genuinely charges phones and devices via its USB ports, making its presence completely natural and unsuspicious.
How to Set Up a WiFi Power Bank Camera Step by Step
Setting up a WiFi power bank camera typically takes about 10 minutes:
Step 1: Charge the device
Connect the power bank camera to a wall outlet via the included charging cable. Charge until the indicator light shows full.
Step 2: Insert a microSD card
Insert a compatible microSD card (usually Class 10, 32GB–128GB) into the card slot on the side or bottom of the device.
Step 3: Download the app
Download the companion app specified in the manual. Most modern models use the Tuya Smart, ICSEE, or a branded app available on iOS and Android.
Step 4: Create an account
Open the app, create an account or log in, and tap “Add Device.”
Step 5: Connect to WiFi
Follow the in-app setup wizard. The camera will enter pairing mode — you’ll hear a tone or see a flashing indicator. Connect to your home WiFi network via the app.
Step 6: Position the camera
Place the power bank in the desired location with the lens pointing toward the area you want to monitor. Ensure nothing is blocking the pinhole lens.
Step 7: Test and configure
Open the app and verify you can see the live feed. Adjust motion detection sensitivity, recording mode, and notification settings.
Best Positions for Placing a Power Bank Camera
The key to effective placement is making the device look natural in its environment:
Home office desk: A power bank sitting on a desk near a computer looks completely normal. Position it to cover the room entrance, windows, or work area.
Living room shelf or entertainment unit: On a shelf with other electronics, the power bank blends in while providing a wide view of the main living area.
Hotel room nightstand: Travelers use power bank cameras to monitor hotel rooms or Airbnb accommodations for security. The nightstand is a natural placement.
Rental property monitoring: Landlords monitoring unoccupied properties can leave a power bank camera without it drawing attention.
Office or workspace: Businesses use power bank cameras for discreet monitoring of equipment, cash drawers, or secure areas.
How to View Live Footage Remotely
Once your power bank camera is set up and connected to WiFi:
1. Open the companion app on your smartphone
2. Select the device from your device list
3. Tap “Live View” to see real-time footage from anywhere with internet access
4. Pinch to zoom for a closer look at specific areas
5. Toggle night vision if viewing in low-light conditions
6. Enable two-way audio to listen or communicate if your model supports it
The live feed works over 4G/LTE or WiFi on your phone, meaning you can monitor your home or office from across the world.
How Motion Detection and Alerts Work
When motion detection is enabled:
1. The camera continuously monitors for movement in the frame
2. When movement is detected, recording begins immediately
3. A push notification is sent to your smartphone with a preview image or video clip
4. The clip is saved to the microSD card and optionally to cloud storage
5. Recording continues until movement stops, then pauses until the next motion event
You can adjust sensitivity to avoid false alarms from things like shadows, fans, or pets. Most apps allow you to set motion detection zones — specific areas of the frame where alerts trigger.
Night Vision Performance: What to Expect
Infrared night vision in power bank cameras works by illuminating the scene with IR light invisible to the human eye, then capturing the reflected light on an IR-sensitive sensor.
Typical night vision range: 5–10 meters in complete darkness
Image quality at night: Clear black-and-white footage adequate for identification purposes
IR LED count: More LEDs generally means better night vision range and brightness
Some models advertise “full color night vision” using white LED illumination visible to the naked eye — this provides color footage but is not truly covert as it produces visible light.

How Much Storage Does a Power Bank Camera Need
At 1080p, video files are typically 1–2GB per hour. Plan storage accordingly:
| Card Size | 1080p Recording Duration |
|---|---|
| 32GB | 16–32 hours |
| 64GB | 32–64 hours |
| 128GB | 64–128 hours |
With loop recording enabled, the camera continuously overwrites the oldest files. For most monitoring scenarios, 64GB provides ample rolling coverage.
Conclusion
A WiFi power bank camera combines genuine functionality with exceptional discretion. It charges your devices, streams live HD video to your smartphone, and records motion-triggered events — all while looking like an ordinary portable charger. Setup takes about 10 minutes and requires no technical expertise. Whether you’re monitoring your home while traveling, securing a workspace, or keeping an eye on a rental property, a quality WiFi power bank camera delivers professional-grade surveillance in a completely unassuming package.
FAQ
Does the power bank camera need to be plugged in to work?
No — the built-in battery powers the camera. Most models provide 3–6 hours of continuous recording or 10–15 hours in motion-detection standby mode on a full charge.
Can I use the power bank camera without WiFi?
Yes — without WiFi, the camera records locally to the microSD card. You just won’t have remote access or real-time alerts until you retrieve and review the card.
How far away can the camera see at night?
Most IR night vision models see clearly up to 5–8 meters in complete darkness. Larger models with more IR LEDs can reach 10–15 meters.
Is the camera visible to other devices on my WiFi network?
Yes — it appears as a connected device on your router. For maximum discretion, use a separate guest network for the camera.
Can multiple cameras be connected to the same app?
Yes — most apps support adding multiple devices. You can monitor several locations simultaneously from one smartphone.