How to Fix Unplayable Audio Files on Voice Recorders
If you’ve ever plugged in a voice recorder only to find the files won’t play, the disk shows garbled characters, or the device seems completely unresponsive, you’re not alone. These are among the most common support tickets we receive from distributors and end users alike. The good news is that the root causes are well understood — and in over 95% of cases, fully reversible without any hardware replacement.
This guide walks through the complete diagnostic and repair process, from the simplest software fix to a full FAT32 filesystem recovery. It also includes B2B-specific protocols for educating your downstream customers before they encounter these issues.
What Causes Audio Files to Become Unplayable
Understanding the root cause helps you apply the right fix — and prevents wasted time replacing hardware that was never broken.
Cause 1 — Codec incompatibility on the playback device. Our recorders capture audio in WAV (PCM) or MP3 format. The built-in Windows Media Player and macOS QuickTime can sometimes fail to open certain WAV bitrates, especially 192 kbps or 44.1 kHz mono files recorded by voice-optimized DSP chips. The file itself is perfectly intact; it simply needs a compatible decoder.
Cause 2 — Forced ejection or hot-swap during read/write. When the device is connected to a computer and the user yanks the USB cable without using “Safely Remove Hardware,” or when the recorder is still recording and powered directly into a charger, the FAT32 allocation table receives an incomplete write. This corrupts the file header or the directory entry, resulting in garbled filenames, zero-byte files, or files that show as present but will not play.
Cause 3 — Hardware ESD or flash cell failure (extremely rare, ~0.2%). In large-scale deployments, a small fraction of units may develop internal flash read errors after thousands of write cycles. This is distinct from the above two scenarios and is addressed separately.
Step 1 — Cross-Verify Using the Device’s Built-In Headphone Output
Before touching the computer at all, perform this hardware verification step. It costs 30 seconds and immediately tells you whether the problem is in the recorder or in the playback software.
Connect the included 3.5 mm headphone adapter cable to the recorder’s audio-out port (on most of our pen recorders and ZD46 models, this is the side-mounted 3.5 mm jack). Plug in a standard pair of earphones. Power on the device in playback mode (typically a long-press of the function button, or navigate to the “Play” menu).
If you can hear the audio clearly through the earphones: The recorder is functioning correctly. The problem is entirely on the computer side — a missing codec or an unsupported player. Proceed to Step 2.
If the audio is distorted, silent, or the file does not load at all: The file or the filesystem itself is damaged. Skip to Step 3 (FAT32 recovery).
Step 2 — Install a Universal Media Player (VLC)
If the headphone test confirmed the files are intact, the fix requires one minute of software installation.
The industry-standard solution is VLC Media Player, available free from videolan.org. VLC bundles every major audio and video codec, including lossless WAV PCM at all sample rates and bitrates. It has no limitations on file size and runs identically on Windows, macOS, Linux, Android, and iOS.
Installation steps on Windows:
1. Open a browser and navigate to `https://www.videolan.org/vlc/`
2. Click “Download VLC” — the page auto-detects your operating system
3. Run the installer and accept all defaults
4. After installation, right-click any WAV file → “Open With” → “VLC Media Player”
Installation steps on macOS:
1. Download the macOS .dmg from the same VLC page
2. Drag VLC to the Applications folder
3. Open VLC → File → Open File → select the WAV from the recorder
Alternative players that also support full WAV playback: foobar2000 (Windows), Audacity (cross-platform, also shows waveform), and PotPlayer (Windows).
Once VLC is installed, all future recordings from the device will open without issues. No changes to the recorder itself are needed.

Step 3 — FAT32 Filesystem Recovery (Garbled Files or Complete Unresponsiveness)
If the headphone test failed, or if the disk shows corrupted filenames (Chinese characters appearing as boxes, random symbols, zero-byte entries that cannot be deleted), the FAT32 filesystem requires a complete reset.
Critical note: This procedure erases all stored recordings. Before proceeding, attempt data recovery using Recuva (Windows) or PhotoRec (cross-platform) if the recordings have evidentiary or commercial value. These tools can often recover files from a logically corrupted FAT32 volume even when Windows cannot display them.
The FAT32 Format Procedure
Prerequisites:
– Power off the voice recorder completely (hold the power button until the LED extinguishes)
– Use the original USB cable (third-party cables with power-only wiring will not expose the drive)
– Use a Windows PC (Windows provides native FAT32 format for removable storage up to 32 GB)
Step-by-step:
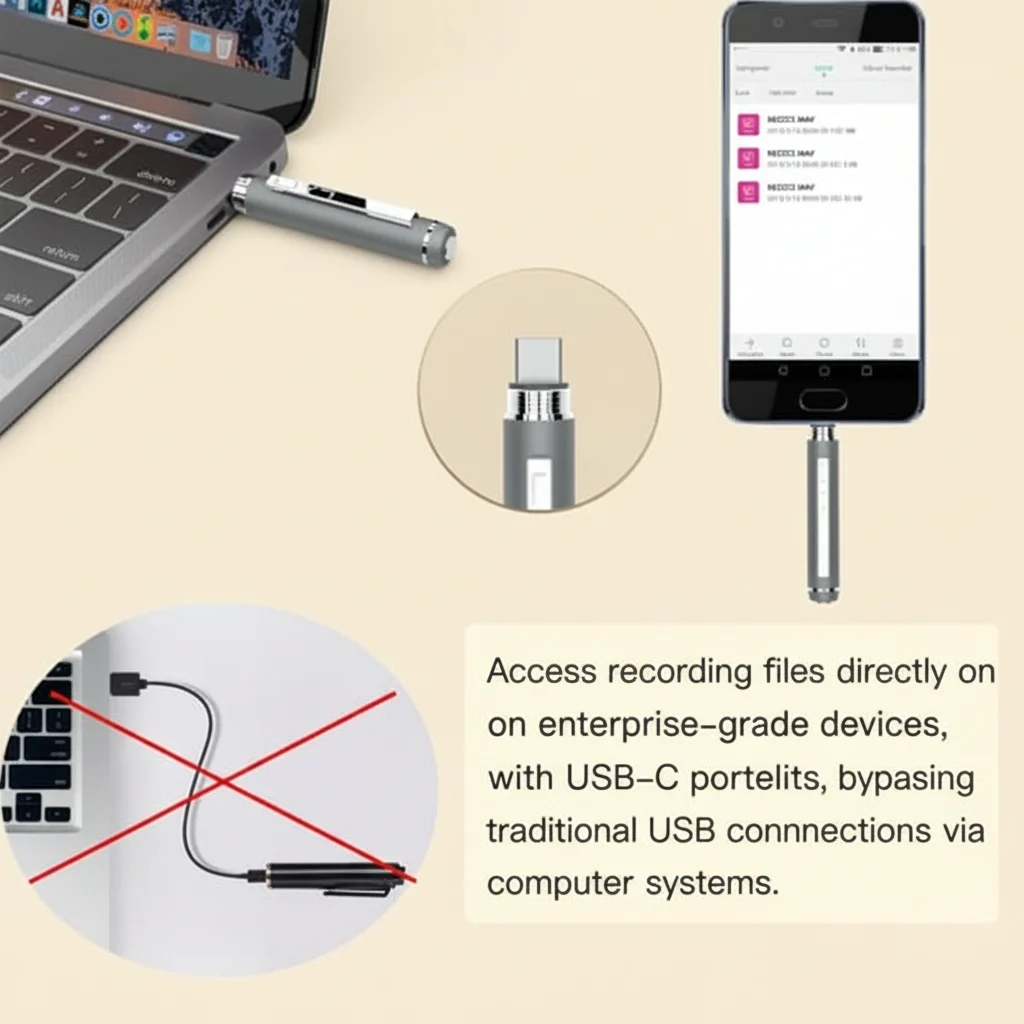
1. Connect the powered-off recorder via USB. Windows will assign it a drive letter (e.g., E: or F:).
2. Open “This PC” (File Explorer). Locate the removable drive — do NOT open it.
3. Right-click the drive icon → select “Format…”
4. In the Format dialog, click “Restore device defaults” first. This resets any custom cluster size to the manufacturer-recommended value.
5. In the “File system” dropdown, verify that FAT32 is selected. If it shows exFAT or NTFS, change it to FAT32.
6. Ensure “Allocation unit size” is set to Default allocation size (typically 4096 bytes for FAT32).
7. Check the box for “Quick Format” (unchecking this runs a sector-level scan, useful if you suspect flash cell failure, but takes 10–20 minutes).
8. Click “Start.” Confirm the warning dialog. The format completes in under 10 seconds for Quick Format.

Step 4 — Reinstall the Time-Sync Utility After Formatting
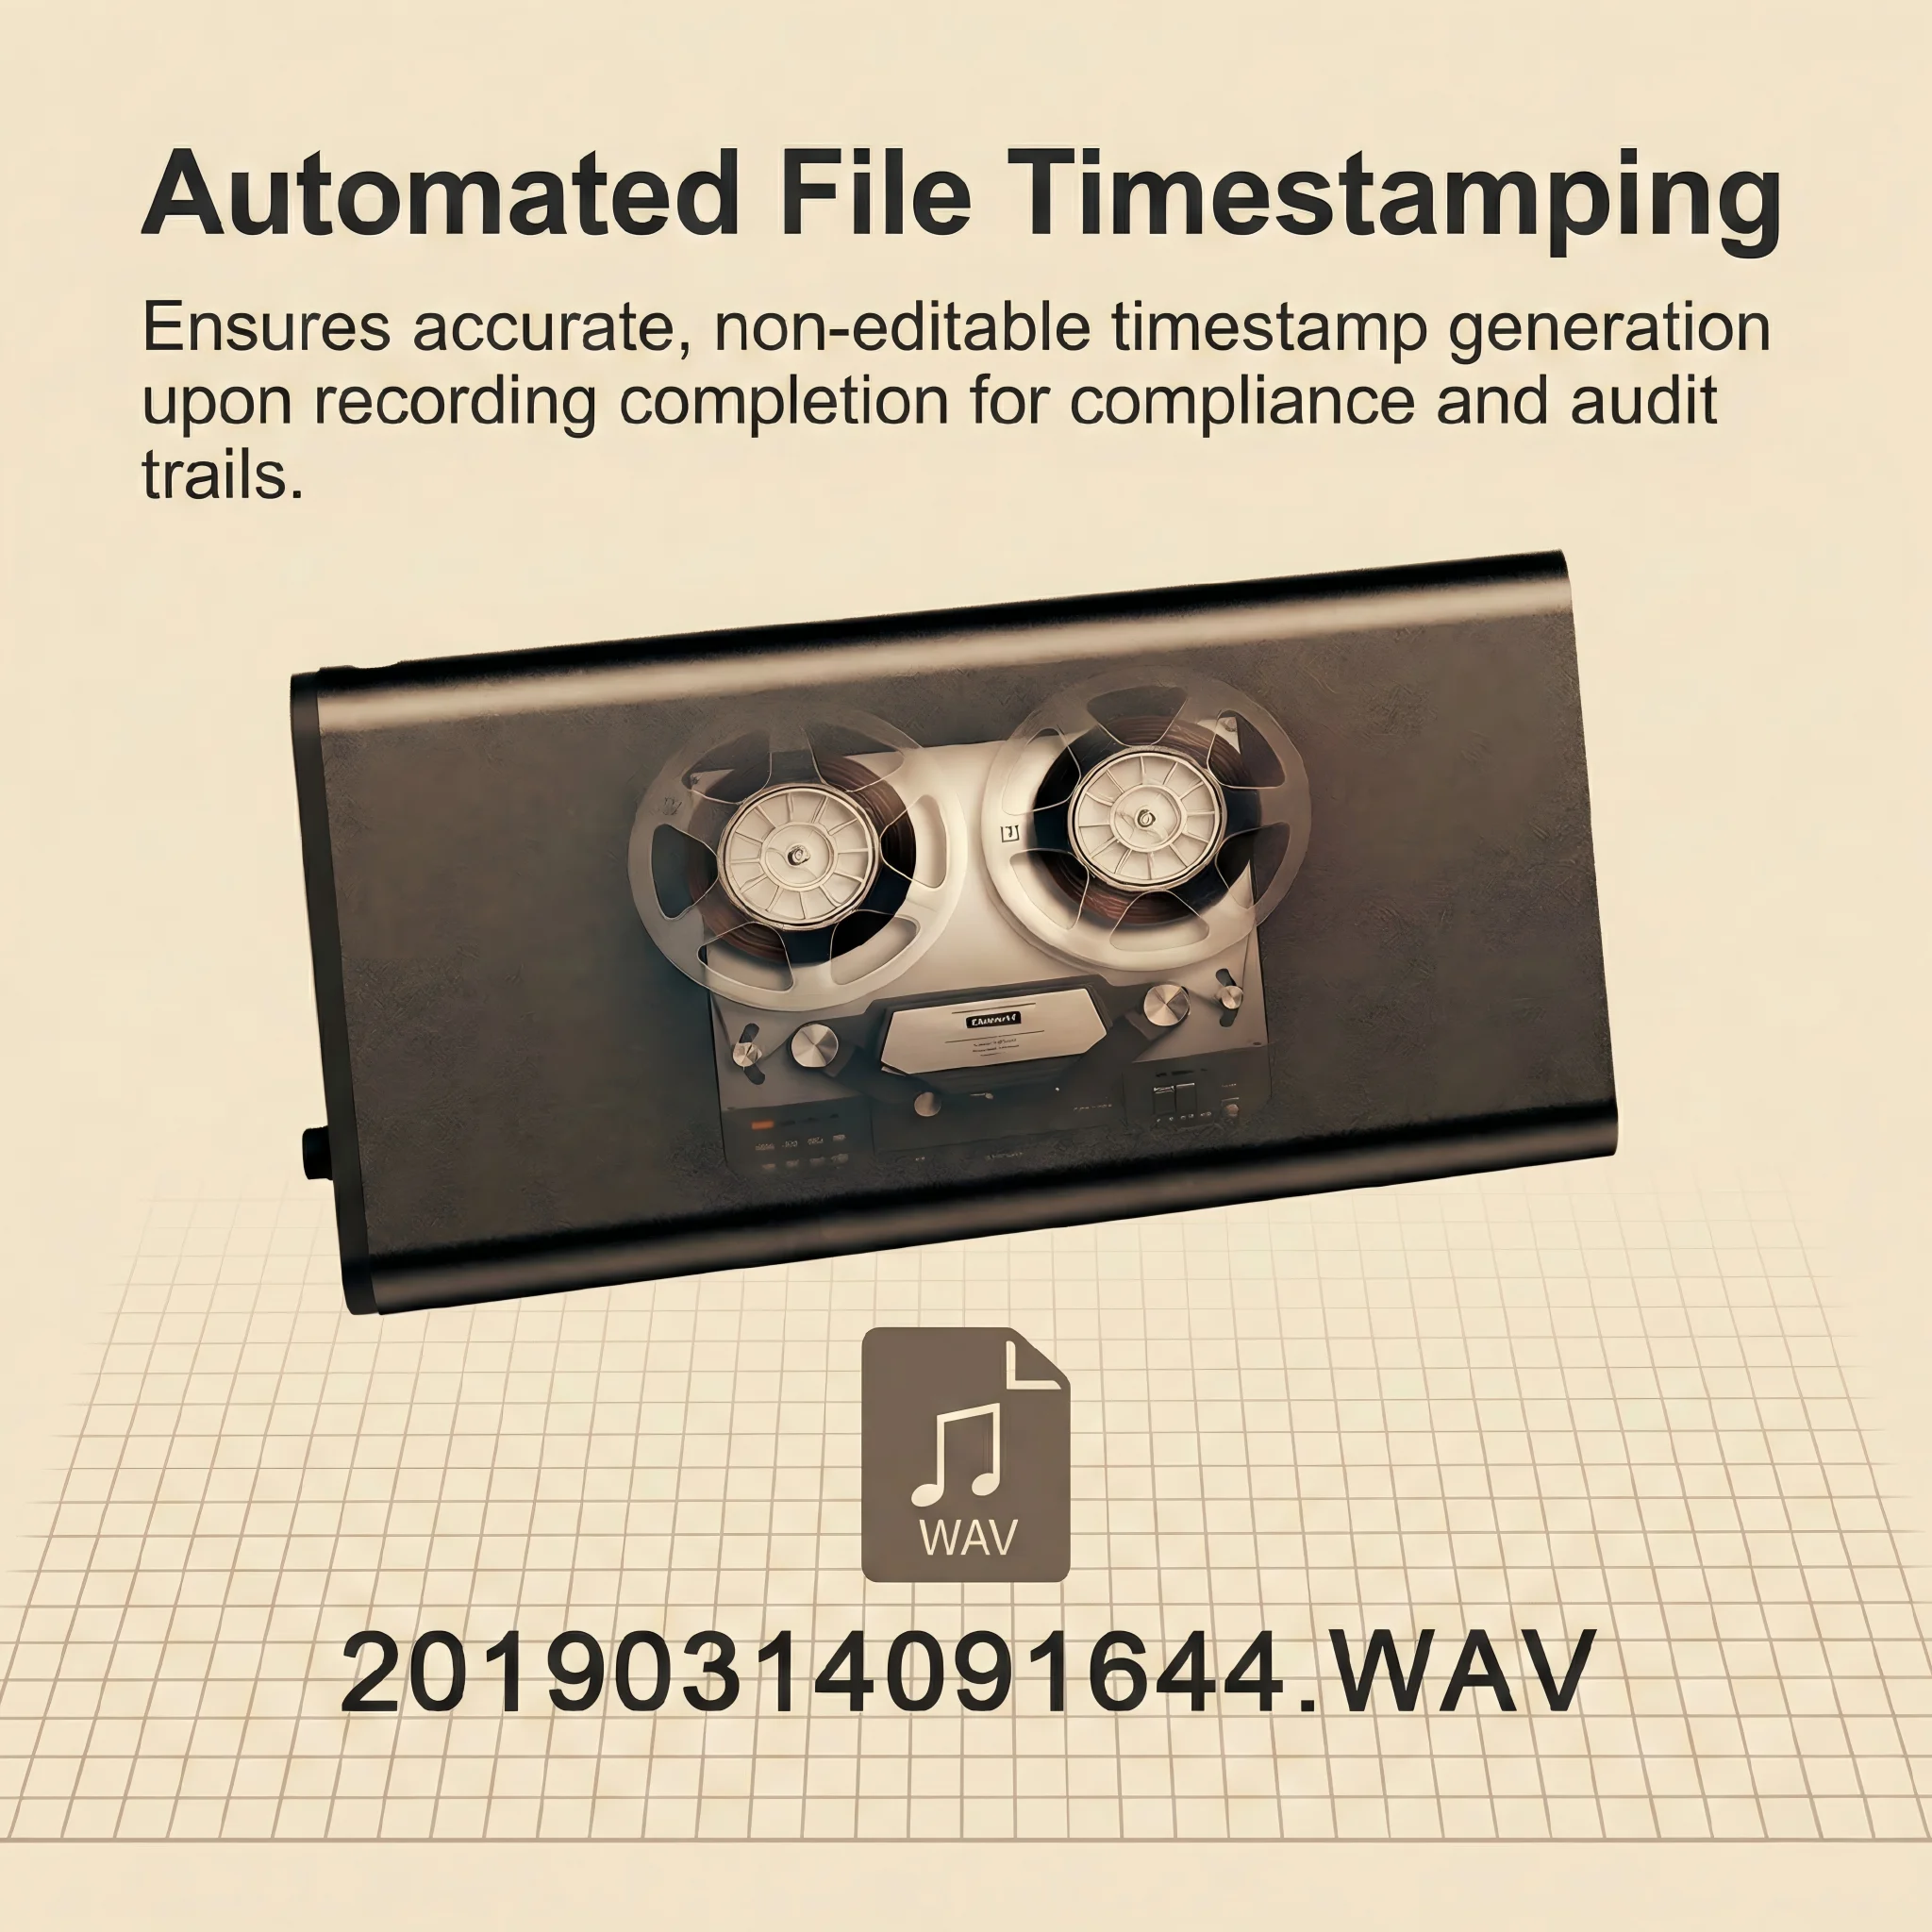
After a FAT32 format, the recorder’s internal real-time clock will lose its synchronization reference. All recordings will be timestamped from the device’s factory default date (often 2020-01-01 00:00:00), which makes file management and audit-trail compliance impossible.
The fix is straightforward: copy the time-synchronization tool back onto the root directory of the recorder before the first use.
Where to find the utility: The time-sync tool is included on the CD/manual card in the original retail package. If the end user no longer has the original package, distributors can download it from our B2B portal or request it via email. The file is typically named `时间设定工具.exe` or `TimeSync.exe` depending on the version.
How it works: When the recorder is connected to a computer and this executable is present in the root directory, the device’s firmware reads the host computer’s system clock and writes it to the recorder’s RTC (Real-Time Clock) chip. This happens automatically on the next connection, requiring no user action.
After completing this step, the recorder is fully operational: correct timestamps, clean directory structure, and no residual garbled entries.
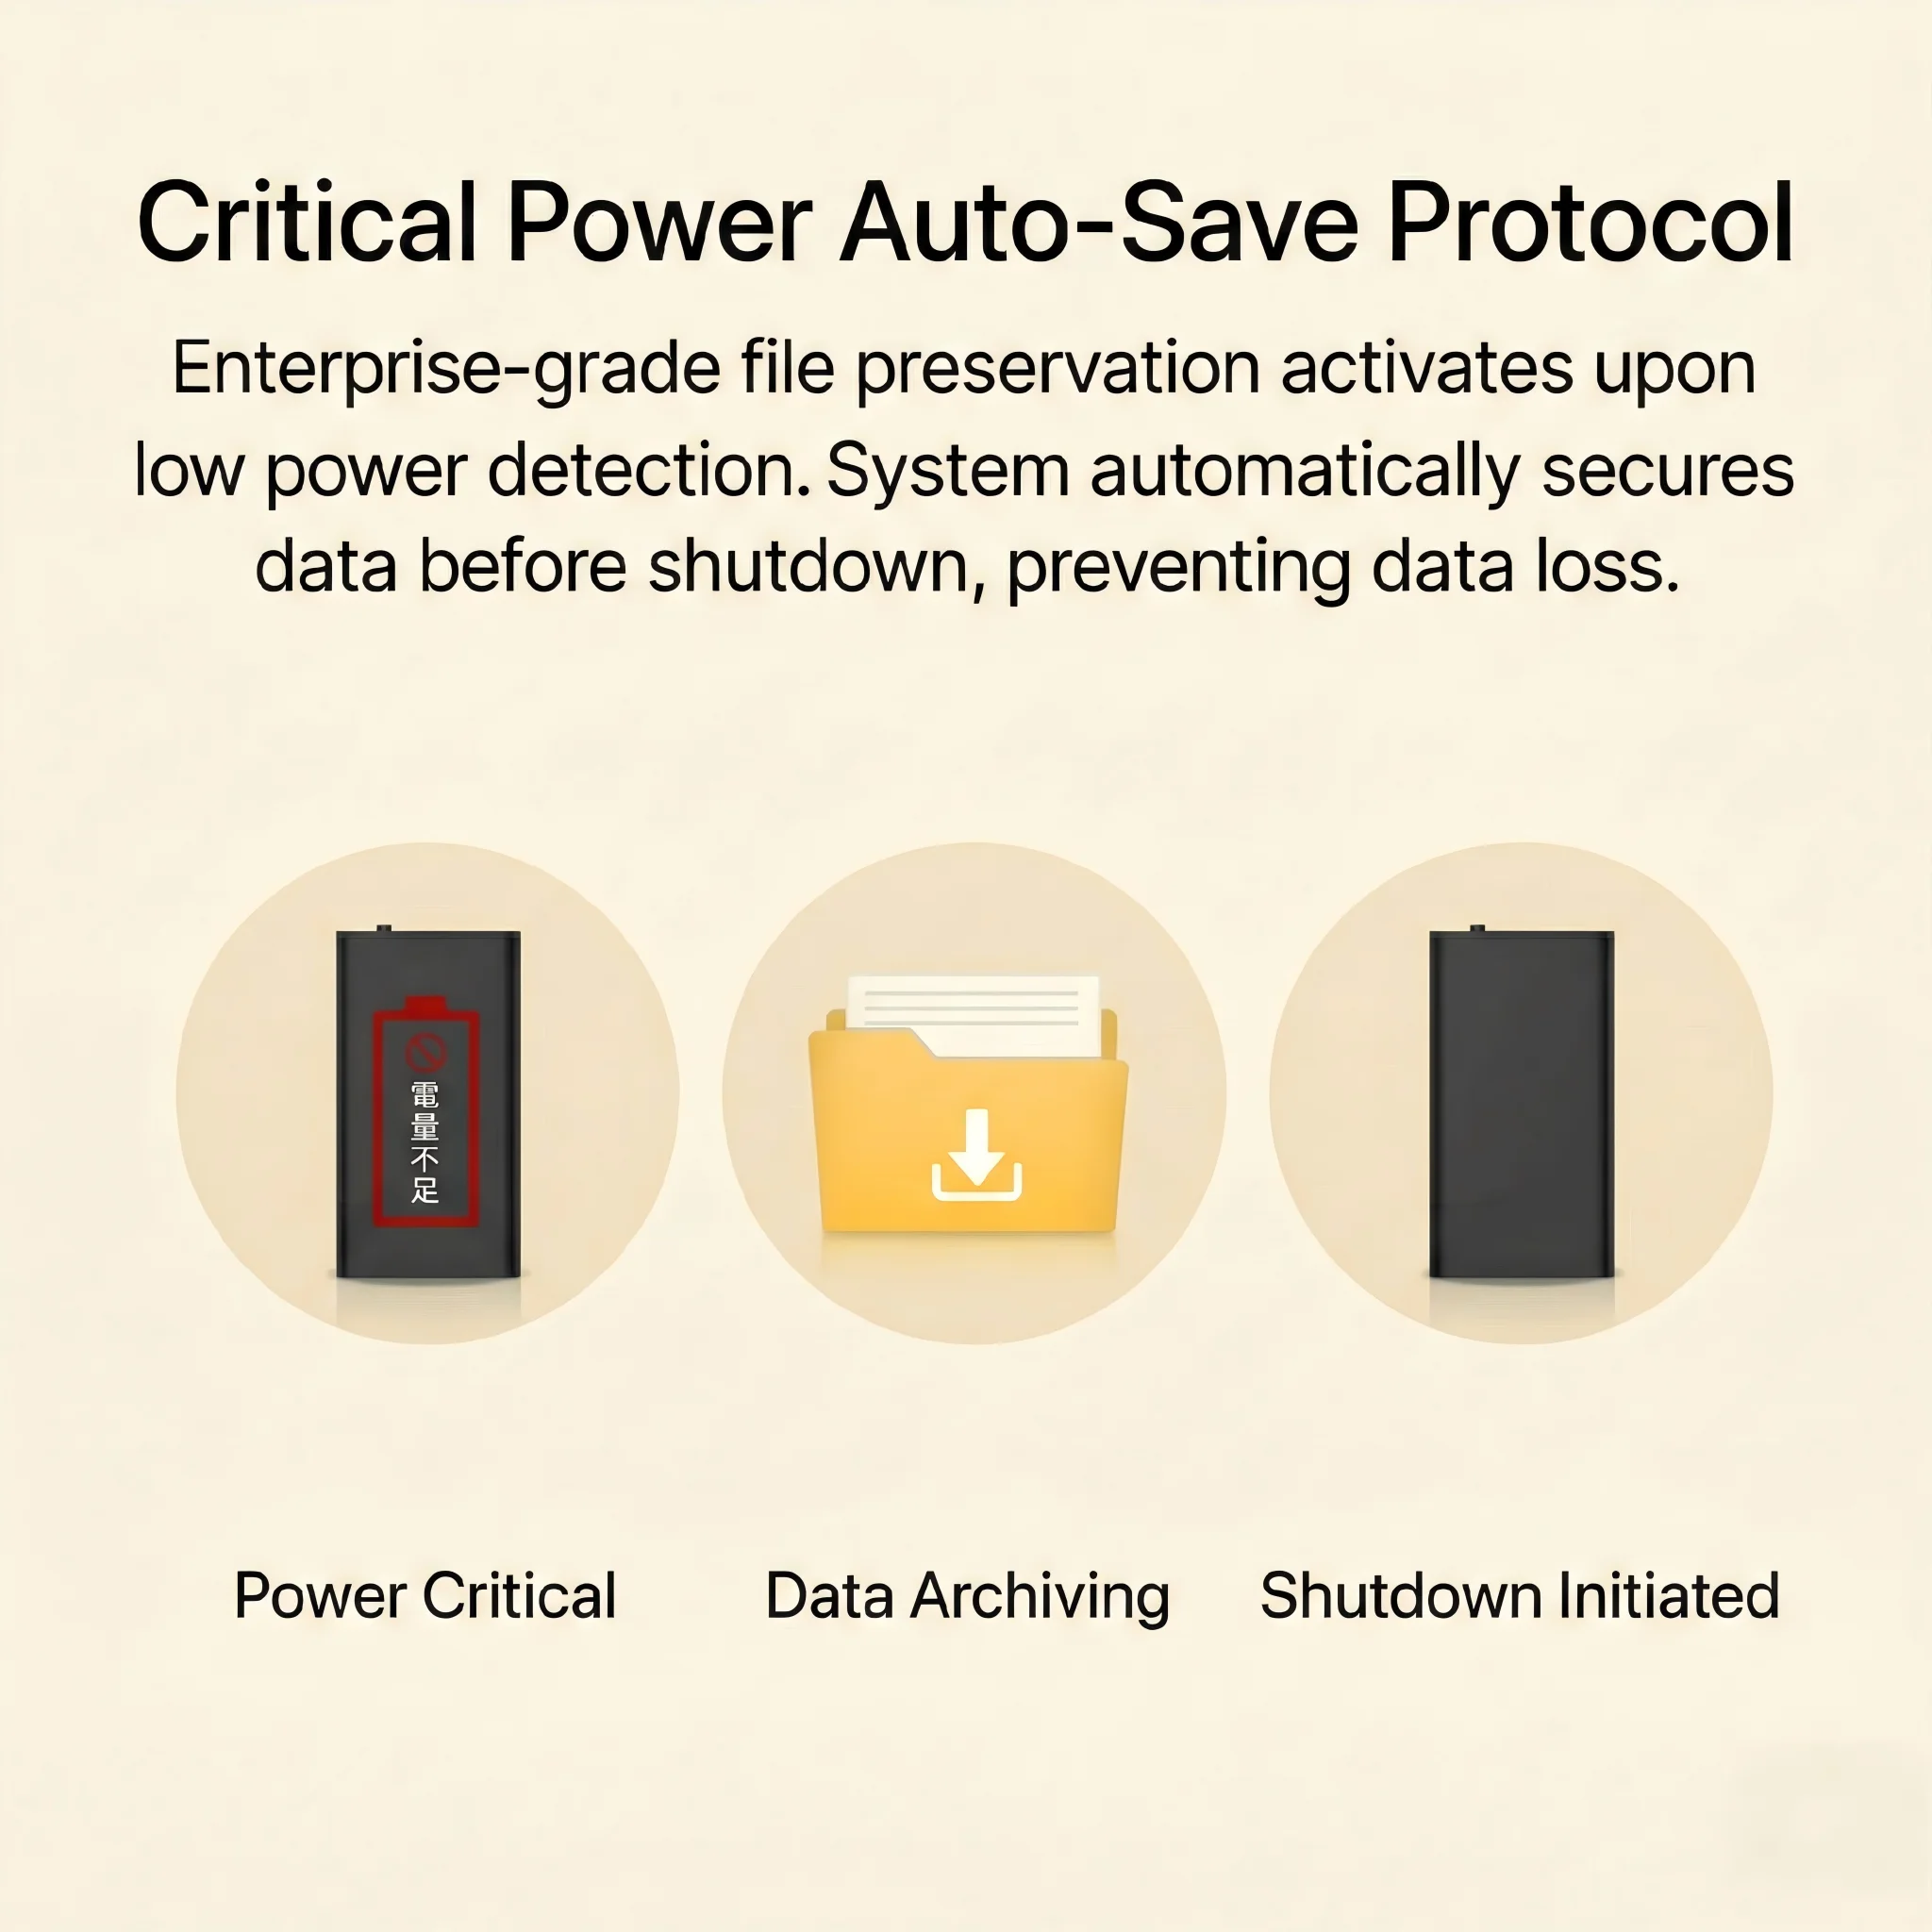
Step 5 — Critical Power Auto-Save for Data Protection
One recurring cause of file corruption that is entirely preventable is recording without monitoring power levels. When a recorder’s battery drops below the minimum operating voltage during an active recording session, the firmware may not have sufficient power to close the file header cleanly before shutdown.
Our recorders include a Critical Power Auto-Save function: when the battery reaches approximately 5–8% remaining capacity, the firmware automatically finalizes the current recording file and writes the FAT32 directory entry before the system shuts down. This produces a fully playable file even from a low-battery shutdown event.
However, this protection only works if the battery is not already dead. A device that was stored uncharged for months may have insufficient voltage to trigger the auto-save circuit at all, which is why the trickle-charging procedure described in our battery maintenance guide is essential before using a long-stored unit.
For B2B customers deploying recorders in evidence collection or compliance scenarios, instruct users to recharge the device when any LED low-battery indicator activates — do not wait until the device shuts off mid-recording.
How to Diagnose Flash Hardware Failure vs. Software Corruption
For distributors handling returns, accurately separating software corruption (FAT32 issues, codec problems) from hardware failure (dead flash cells) prevents unnecessary warranty replacements and expedites correct resolutions.
Indicators of software/logical corruption (fixable):
– Files visible on disk but unplayable
– Garbled or Chinese-character filenames on a non-Chinese OS
– Disk shows incorrect total/free capacity
– Device recognized by Windows Device Manager but drive not appearing in File Explorer
– Error message: “The file or directory is corrupted and unreadable”
Indicators of hardware/flash failure (requires unit replacement):
– Windows Device Manager shows the device with a yellow warning triangle
– Format attempt returns error: “Windows was unable to complete the format”
– `chkdsk` (Windows check disk) reports bad sectors on the volume
– The device is recognized differently every time it’s connected (inconsistent drive letter, capacity fluctuating)
– Unit was exposed to water, extreme heat (>70°C), or physical impact
Running `chkdsk E: /f` from an elevated Command Prompt (replace E: with the actual drive letter) will automatically repair minor FAT32 errors without a full format — useful when the user wants to preserve recoverable recordings.
B2B Prevention Protocol: Educating End Users Before Problems Occur
For resellers and distributors, reducing support tickets starts with setting correct usage expectations at the point of sale. The two behaviors that cause 90% of all FAT32 corruption incidents are:
1. Hot-unplugging the USB cable. When users pull the recorder out of a computer without clicking “Safely Remove Hardware” (Windows) or “Eject” (macOS), the operating system’s write-behind cache may still have unflushed data. The solution is to include a printed instruction card: “Always eject before unplugging.” Windows 10 and 11 offer a “Quick Removal” policy that reduces (but does not eliminate) this risk.
2. Connecting to a charger while actively recording. Some users insert the recorder into a power bank or wall charger to extend a recording session. Depending on the device model and firmware version, this can interrupt the write cycle. The correct procedure is to stop recording first, then connect to charge.
Recommended B2B onboarding checklist for new deployments:
– Demonstrate the time-sync procedure at initial setup
– Show the “Safely Remove Hardware” workflow on Windows and macOS
– Pre-install VLC on any computers intended to play back recordings
– Include the time-sync utility in the device’s root directory before shipping to end customers
For large enterprise deployments (50+ units), consider pre-formatting all devices to FAT32 with the time-sync utility pre-loaded before distribution. This eliminates the most common Day 1 support scenarios.
Frequently Asked Questions
Q: My recorder worked fine yesterday. Today the files are all showing as 0 bytes. What happened?
A: This is a classic sign of an interrupted write cycle — most likely the USB cable was disconnected before the OS flushed its cache. Run `chkdsk /f` on the drive first to see if the file headers can be recovered without a format. If `chkdsk` fails, proceed to the full FAT32 format and reinstall the time-sync tool.
Q: Can I use exFAT instead of FAT32? My computer says FAT32 is outdated.
A: No. Our recorder firmware is designed exclusively for FAT32. The firmware’s file-writing routines, directory indexing, and time-sync tool are all coded against the FAT32 spec. Using exFAT will cause the device to fail to recognize the filesystem entirely. Always format as FAT32.
Q: The format failed with “Windows was unable to complete the format.” What now?
A: This indicates likely hardware flash failure, not a software issue. Try formatting using a third-party tool such as SD Card Formatter (from the SD Association) or HP USB Disk Storage Format Tool, which can bypass Windows’ own formatter and write directly to the controller. If the format still fails, the internal flash is dead and the unit requires replacement.
Q: VLC is installed but the file still won’t play — I see a black screen and no audio.
A: This usually means the file itself is corrupt (zero-byte or truncated header), not a codec issue. Open the file in Audacity (free, cross-platform). Audacity will display the raw waveform even for partially damaged files and can often play the intact portion. If Audacity shows a flat line for the entire duration, the file content is gone and only the directory entry survived.
Q: How do I prevent this entirely for a batch of 200 units I’m distributing?
A: Pre-format all 200 units to FAT32 from a central workstation before boxing. Place the time-sync utility in each unit’s root directory. Seal the units. This guarantees a clean filesystem state regardless of how the units were handled in shipping or warehouse storage.
Conclusion
The vast majority of “unplayable recording” complaints trace back to two fully preventable root causes: codec incompatibility on the playback computer, and FAT32 corruption from improper USB disconnection. Neither involves any hardware defect.
For distributors, the right approach is to arm your customers with three things: VLC installed before Day 1, a clear “Safely Eject” habit, and the time-sync utility pre-loaded on every device. These three measures will eliminate over 90% of inbound support tickets on voice recorder products.
For the remaining edge cases — genuine flash hardware failures — the diagnostic criteria in this guide allow you to identify them quickly, apply for warranty replacement when justified, and avoid costly misdiagnosis.
If you are a wholesale buyer or OEM customer evaluating our voice recorder line for your market, contact our B2B team for device-specific firmware documentation, bulk pre-format services, and after-sales training materials.