Wie man eine WiFi-Verkdecktkamera repariert, die sich nicht mit der App verbindet
A WiFi hidden camera that refuses to connect to its companion app is one of the most common support issues users encounter. The problem is almost always caused by one of a handful of fixable conditions — the wrong WiFi band, a missed pairing step, a firmware glitch, or a firewall restriction. This guide walks through every cause and fix in order, from the simplest checks to deeper network troubleshooting.
What Is the Most Common Reason a WiFi Spy Camera Won’t Connect
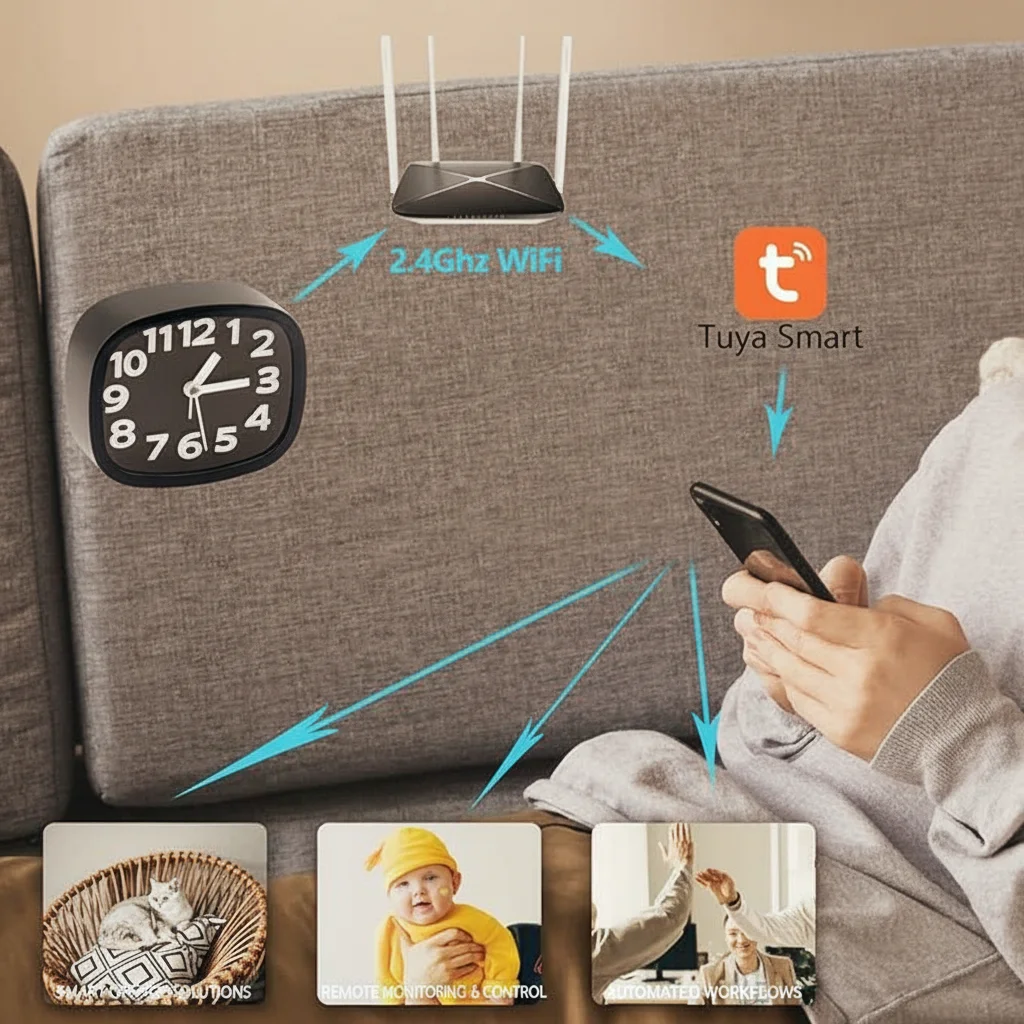
The single most common cause is the 2.4GHz vs 5GHz WiFi band mismatch. Most hidden cameras — clock cameras, USB charger cameras, smoke detector cameras, and similar devices — only support 2.4GHz WiFi networks. If your phone is connected to a 5GHz band (often labeled as “YourNetwork_5G” or “YourNetwork_5GHz”) when you attempt to pair the camera, the setup will fail silently or show a “device not found” error.
Before trying anything else, confirm that your phone is connected to the 2.4GHz version of your home network during the pairing process.
Step-by-Step Troubleshooting Guide
Step 1: Verify Your WiFi Band
Open your phone’s WiFi settings and check which network you are connected to. If your router broadcasts both a 2.4GHz and 5GHz band under different names, connect to the 2.4GHz network before opening the camera app. If your router uses the same SSID for both bands (band steering), you may need to temporarily disable the 5GHz band in your router’s admin settings to force the phone and camera onto 2.4GHz during pairing.
After pairing is complete, you can re-enable 5GHz — the camera will remain on 2.4GHz and your phone can switch back to 5GHz for faster speeds.
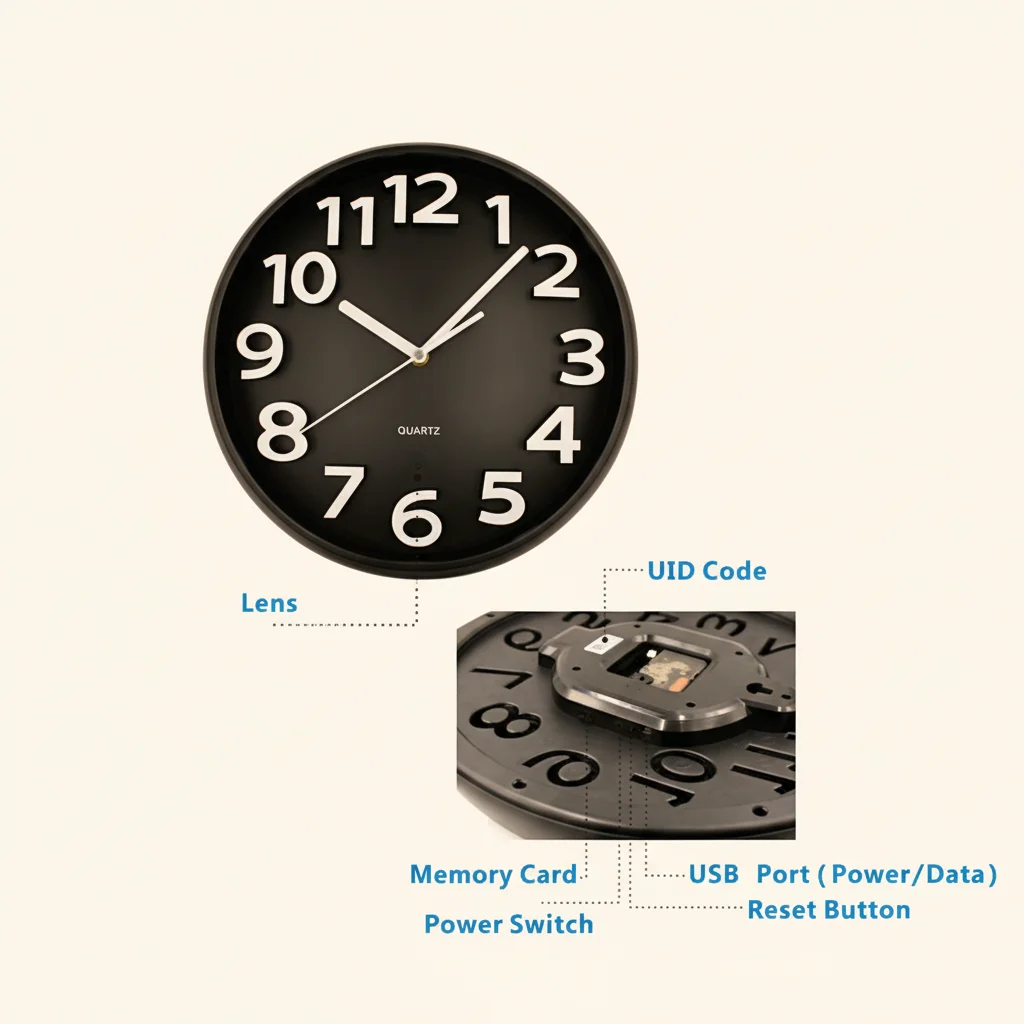
Step 2: Reset the Camera to Pairing Mode
Hidden cameras do not automatically re-enter pairing mode after a failed setup attempt. You must manually trigger it by pressing and holding the reset button for 5–10 seconds until the indicator LED blinks rapidly or changes color (the specific behavior depends on your model). Once the LED indicates pairing mode, return to the app and attempt to add the device again.
The reset button location varies by device type:
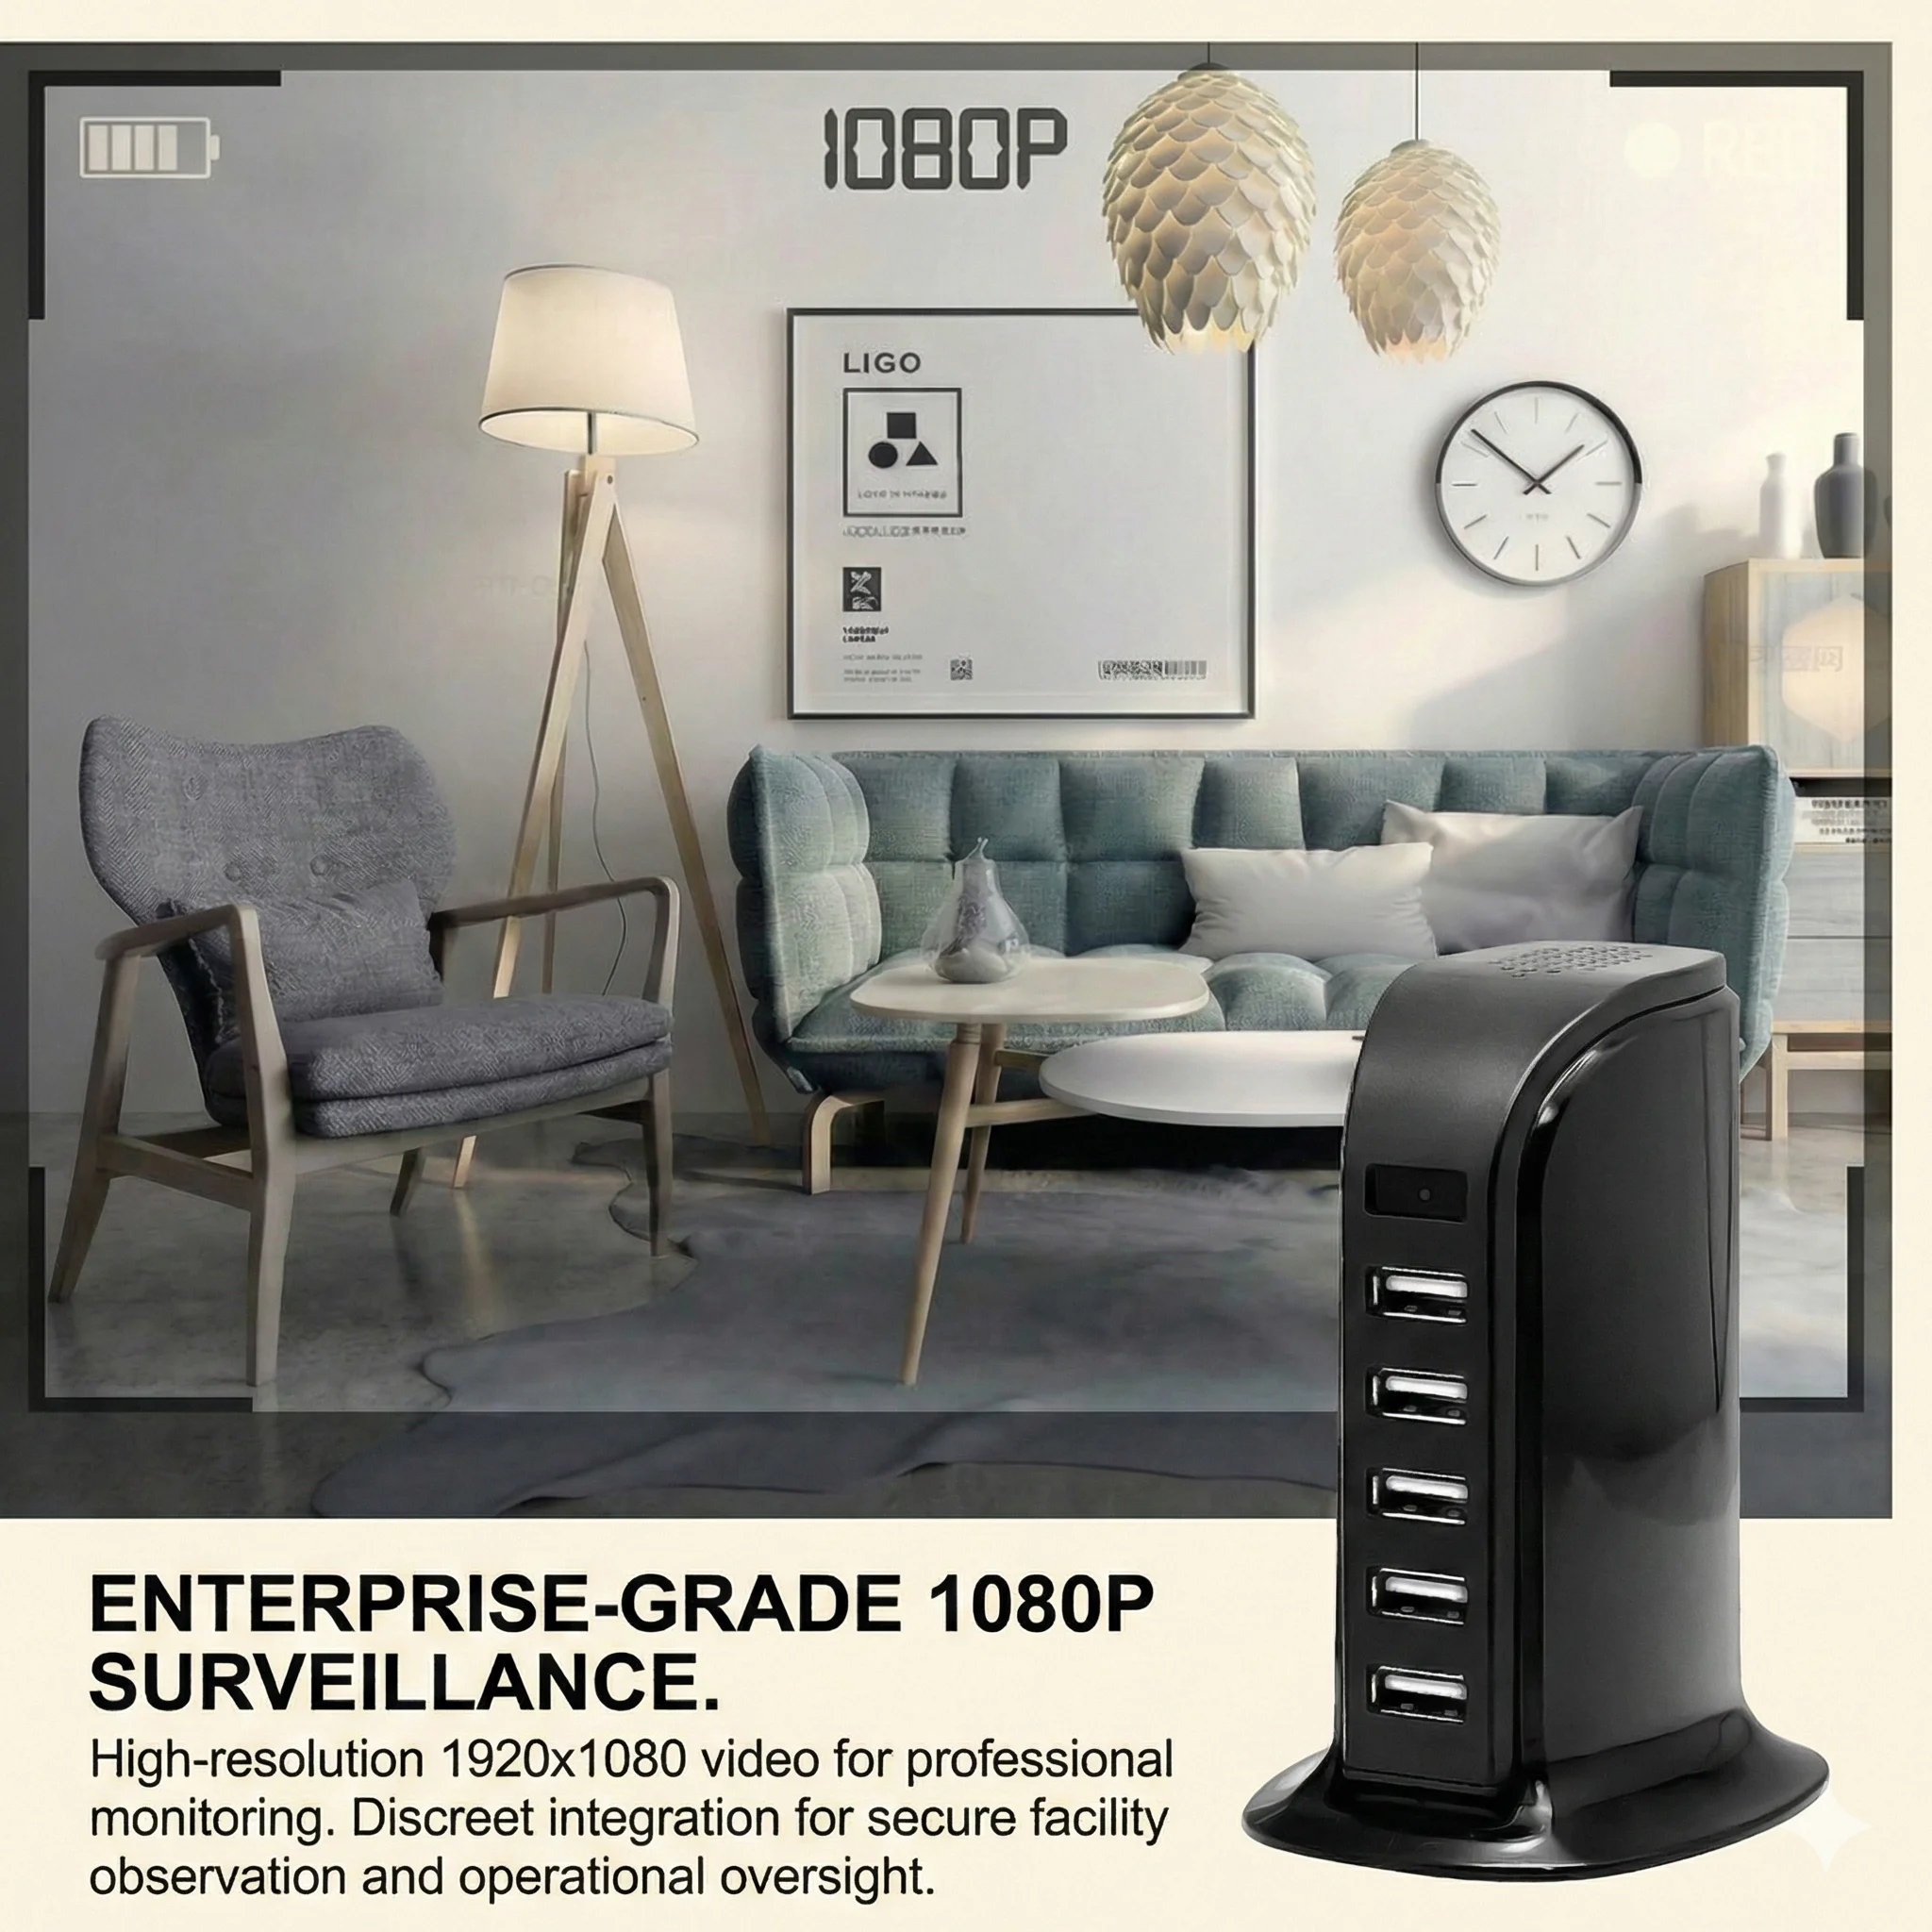
– Clock cameras: Usually on the back or bottom of the unit near the USB port
– USB-Ladegerät Kameras: Small pinhole on the side or back
– Smoke detector cameras: Button accessible through the mounting bracket
– Power bank cameras: Pinhole button on the side panel
Step 3: Check Your WiFi Password
A mistyped WiFi password is a frequent cause of pairing failure. Most apps display a password entry field during setup that does not show characters as you type. Re-enter your WiFi password carefully, paying attention to uppercase letters, numbers, and special characters. If you recently changed your router password, the camera will also need to be re-paired with the new credentials.
Step 4: Move the Camera Closer to the Router
During initial pairing, position the camera within 3 meters (10 feet) of your WiFi router. Walls, metal objects, and other electronics between the camera and router attenuate the 2.4GHz signal. A weak signal during pairing causes the camera to timeout before completing registration, even if the same signal would be strong enough for normal operation after pairing. Once pairing is complete, move the camera to its intended location.
Step 5: Force-Close and Restart the App
If the camera entered pairing mode correctly and your WiFi credentials are correct, but the app still shows a connection error, force-close the companion app (Tuya Smart, HDLiveCam, or your specific camera’s app), wait 10 seconds, and reopen it. Some app versions have a known bug where a stale connection attempt from a previous session blocks new pairing. Force-closing clears this state.

Step 6: Check Phone Permissions
Camera apps require location permission during WiFi device pairing on both iOS and Android. This is because accessing nearby device names and WiFi network information requires location access at the OS level. If you denied this permission when first installing the app, the pairing scan cannot discover the camera. Go to your phone’s app permissions settings and ensure the camera app has Location permission set to “While Using the App” or “Always.”
On Android, also check that the app has WiFi and nearby device permissions enabled.
Step 7: Disable VPN and Check Router Firewall
If you use a VPN on your phone, disable it before pairing. VPNs reroute traffic and can prevent the app from communicating directly with the camera on the local network. Similarly, if your router has AP Isolation or Client Isolation enabled (a setting that prevents wireless devices from communicating with each other), disable it temporarily. Hidden cameras need direct LAN-to-LAN communication between the phone and the camera during pairing.
Router admin panels vary by manufacturer. Look for “Wireless Isolation,” “AP Isolation,” or “Client Isolation” under the wireless settings section.
Step 8: Perform a Full Factory Reset
If the camera was previously paired to another account or another WiFi network, residual configuration data can prevent it from pairing again. A full factory reset clears all stored network credentials and account bindings. Hold the reset button for 15–20 seconds (longer than the standard pairing-mode reset) until the LED flashes a different pattern — this typically indicates a full reset rather than just entering pairing mode.
After a full factory reset, start the pairing process from the beginning in the app’s “Add Device” section.
WiFi Camera Connection Errors by Device Type
Different hidden camera form factors have slightly different pairing workflows and common failure points.
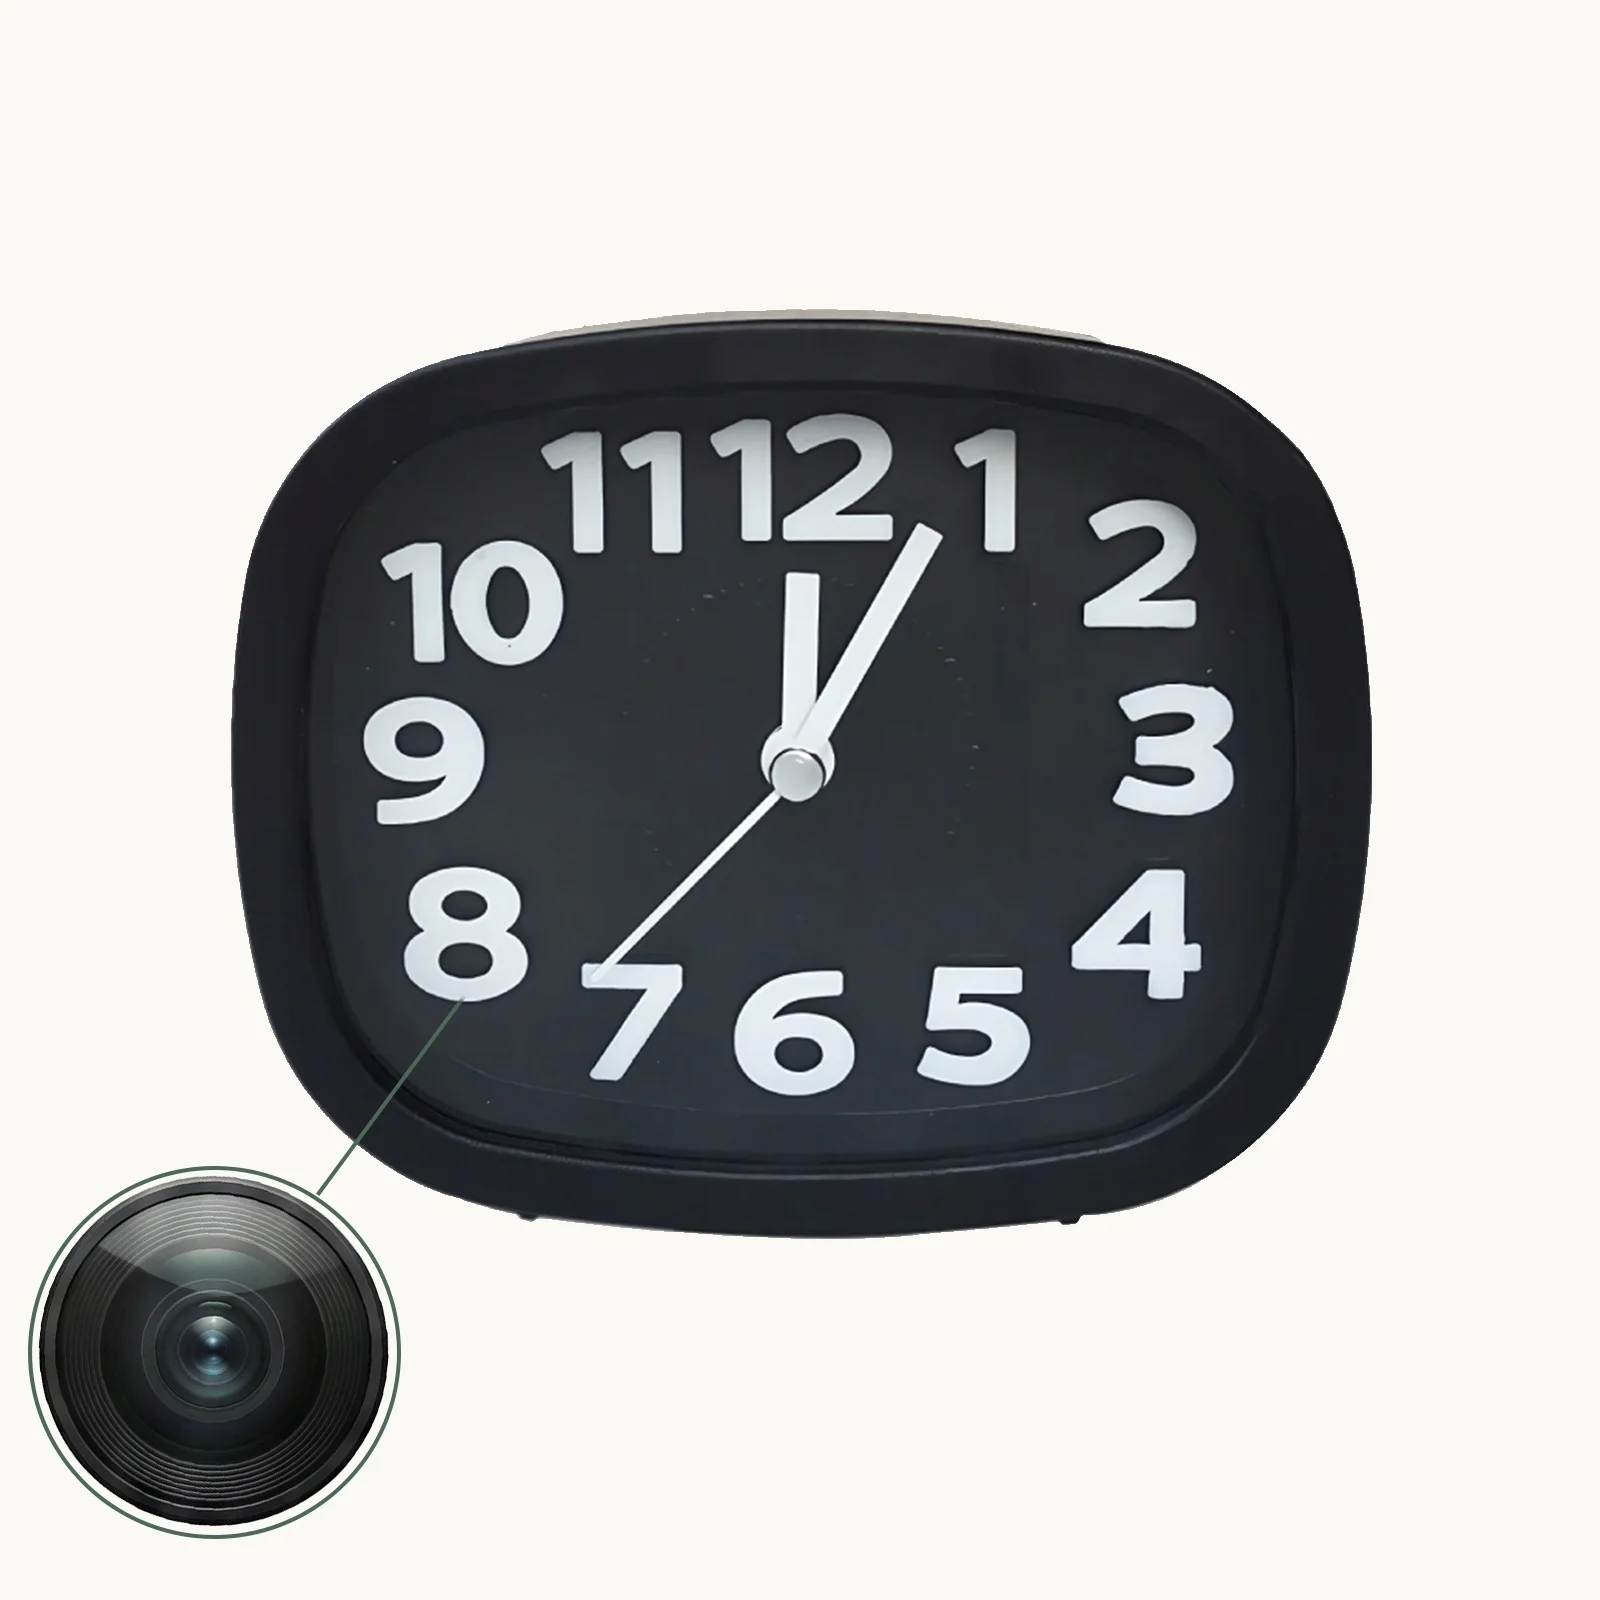
Clock cameras (Z10, C6, and similar) use Tuya Smart or a proprietary app. The most common failure point is the 2.4GHz band issue. These cameras also sometimes fail if the phone’s Bluetooth is off during pairing — some Tuya-based cameras use Bluetooth for the initial handshake before switching to WiFi.
USB-Ladegerät Kameras are straightforward in setup but sensitive to network password errors. Because the setup interface on these devices has no screen, there is no visual feedback on what went wrong. If pairing fails, assume a password error first and re-enter your WiFi credentials carefully.
Smoke detector cameras occasionally fail to connect because of ceiling placement far from the router. If your router is on a lower floor, the signal attenuation through the ceiling can cause pairing timeouts. Bring the camera down to the same floor as the router for initial pairing, then mount it in its final position afterward.
WiFi power bank cameras may fail to connect if the internal battery is below 20%. Charge the device for at least 30 minutes before attempting pairing.
How to Tell If Your Camera Is Connected Successfully
A successfully connected camera will appear in your app’s device list with a green or colored status indicator and the option to tap and view a live feed. The live feed should load within 5–15 seconds depending on your internet speed. If the device appears in your list but shows “Offline” or “Device Unavailable,” the camera is registered to your account but is not currently on the network — check that it is powered on and within WiFi range.
Motion detection notifications will begin appearing on your phone once the camera is connected and motion detection is enabled in the app settings.
What to Do If Nothing Works
If you have tried all of the above steps without success, the issue is likely one of three remaining causes:
1. ISP-level restrictions: Some mobile data connections (when your phone uses cellular rather than WiFi) prevent local network device discovery. Always pair on WiFi, not mobile data.
2. Firmware Beschädigung: Rarely, a camera’s firmware becomes corrupted during a failed update. Contact your supplier and request a firmware reflash or replacement unit.
3. Hardwaredefekt: If the camera’s WiFi module is damaged (from static discharge, physical shock, or manufacturing defect), it will fail to connect regardless of configuration. Test the camera on a completely different router and phone before concluding hardware failure.
Tipps, um Verbindungsprobleme in Zukunft zu vermeiden
Halten Sie die Firmware Ihres Kamera durch die Companion-App aktuell – Updates enthalten oft Verbesserungen des WiFi-Stacks, die die Verbindungsstabilität erhöhen. Stellen Sie sicher, dass auch die Router-Firmware aktuell ist. Platzieren Sie Ihre Kamera innerhalb eines angemessenen WiFi-Reichweite (idealerweise in Sichtlinie oder durch eine einzelne Wand) für eine zuverlässige Langzeitverbindung. Vermeiden Sie die Platzierung von Kameras in der Nähe großer Metallobjekte wie Kühlschränke oder Mikrowellen, die 2,4GHz-Signale beeinträchtigen.
Wenn Sie mehrere versteckte Kameras betreiben, verwenden Sie einen dedizierten 2,4GHz-only SSID auf Ihrem Router. Dies eliminiert Band-Steering-Interferenzen und bietet Ihnen einen sauberen Netzwerksegment für alle Ihre Überwachungsgeräte.
Schlussfolgerung
Eine WiFi versteckte Kamera, die sich nicht mit ihrer App verbindet, ist fast immer ein Konfigurationsproblem, nicht ein Hardwaredefekt. Arbeiten Sie die Checkliste in der Reihenfolge durch: bestätigen Sie das 2,4GHz-Band, setzen Sie auf Pairing-Mode zurück, verifizieren Sie Ihr WiFi-Passwort, prüfen Sie App-Berechtigungen, und deaktivieren Sie VPN oder AP-Isolation. Die meisten Verbindungsprobleme lösen sich bei einem dieser Schritte. Wenn Sie Schritt 8 erreichen und die Kamera sich immer nicht verbindet, kontaktieren Sie Ihren Lieferanten für Firmware- oder Hardware-Support.
Häufig gestellte Fragen
Warum geht meine Spy-Kamera nach der Verbindung immer offline?
Unregelmäßige Verbindungsabbrüche werden meist durch schwache WiFi-Signale am Standort der Kamera, Router-Interferenzen oder einen IP-Adresskonflikt verursacht. Versuchen Sie, der Kamera eine statische DHCP-Reservierung in Ihren Router-Einstellungen zuweisen, um IP-Konflikte zu vermeiden. Die Verbesserung des WiFi-Signals mit einem Reichweitenverstärker hilft ebenfalls.
Kann ich eine WiFi-Videokamera mit einem öffentlichen WiFi-Netzwerk oder Hotel-WiFi verbinden?
Generell nicht. Die meisten öffentlichen und Hotel-WiFi-Netzwerke verwenden AP-Isolation, die die Kommunikation zwischen Geräten im Netzwerk blockiert. Dies blockiert die lokale P2P-Verbindung, die versteckte Kameras verwenden. Für Überwachung in einem Hotelzimmer oder öffentlichen Ort verwenden Sie stattdessen einen portablen Travel-Router mit Ihren eigenen WiFi-Zugangsdaten.
Meine Kamera wurde erfolgreich gepaart, aber der Live-Feed ist schwarz. Was ist das Problem?
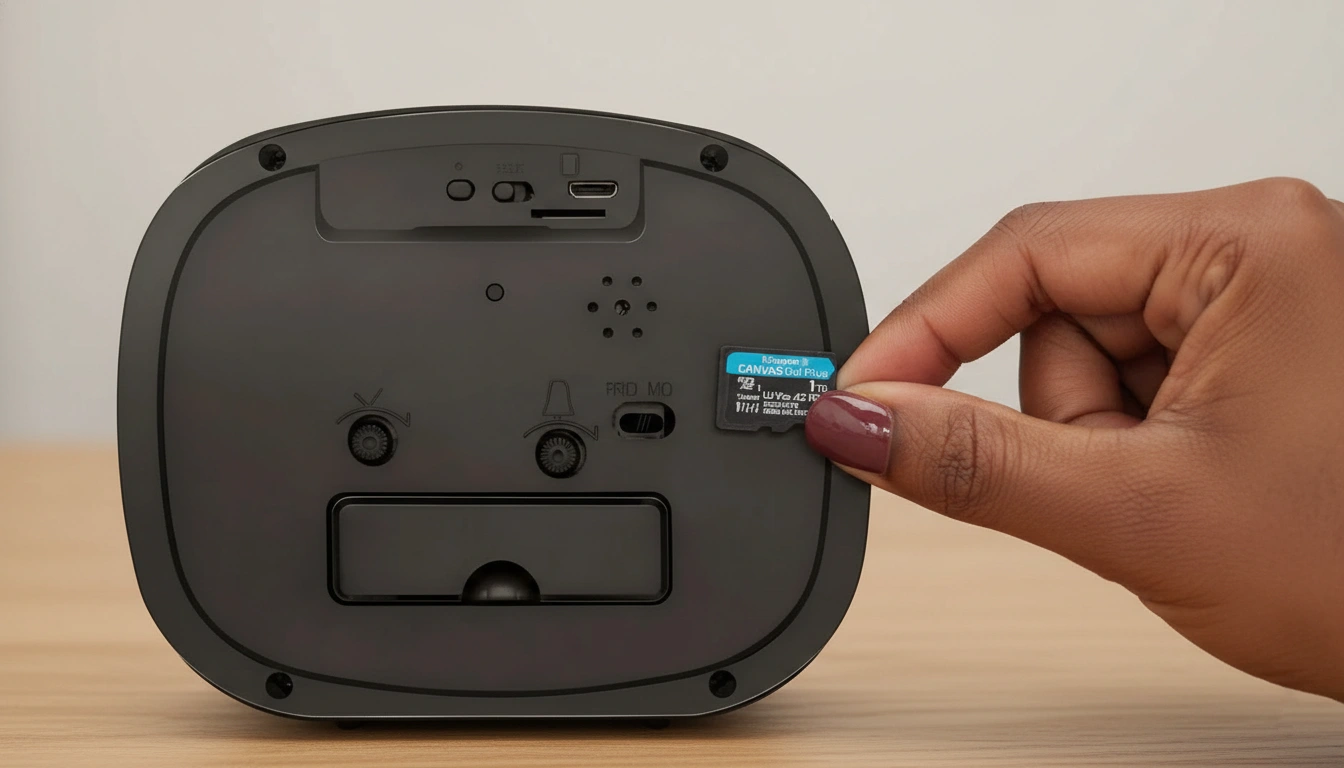
Ein schwarzer Live-Feed deutet meist darauf hin, dass die Kamera mit der App verbunden ist, aber der Video-Stream nicht geladen wird. Versuchen Sie, die Kamera aus- und wieder einzuschalten, die SD-Karte zu prüfen (eine vollständige oder beschädigte Karte kann den Stream-Ausgang bei manchen Modellen beeinflussen), und zu verifizieren, dass Ihre Internet Upload-Speed mindestens 2 Mbps ist.
Muss die App ständig offen sein, damit die Kamera aufzeichnet?
Nein. Nach der Konfiguration zeichnet die Kamera unabhängig auf ihre SD-Karte und uploadet Bewegungsalarme auf Ihr Telefon. Die App muss nur offen sein, wenn Sie den Live-Stream sehen oder aufgezeichnete Clips überprüfen möchten.
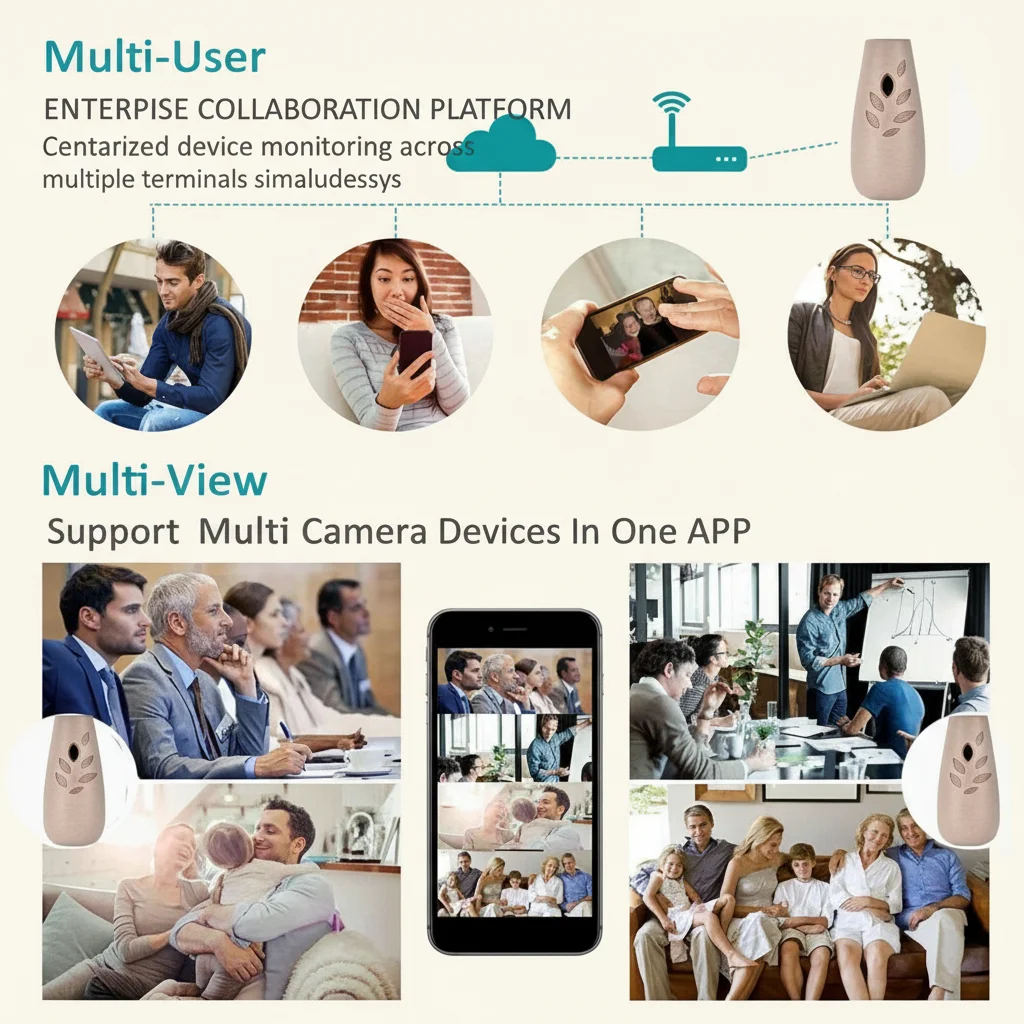
Können mehrere Telefone gleichzeitig denselben Kamera überwachen?
Ja. Die meisten Tuya-basierten und ähnliche Apps unterstützen das Teilen des Zugangs zu Geräten mit anderen Accounts. Der Hauptaccount-Halter kann den Zugang zur Kamera durch die “Gerät teilen” Funktion der App teilen, sodass Familienmitglieder oder Geschäftspartner den gleichen Kamera-Feed sehen können.